
Description
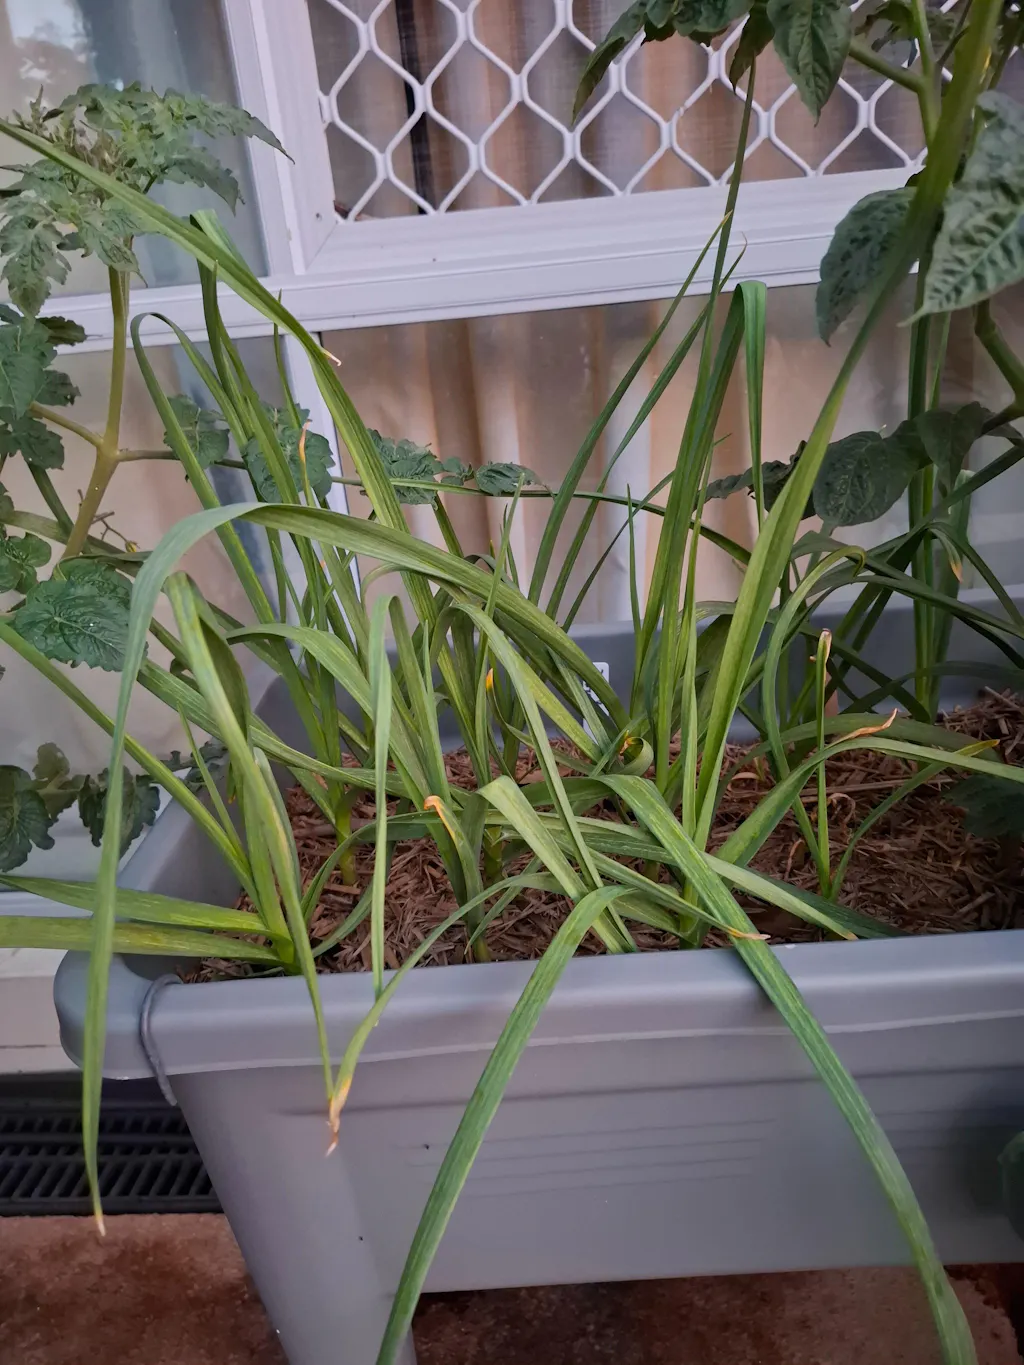
Garlic - Glenlarge (Early Purple)
Allium sativum
NOT to WA & TAS
⚠️ Stock Update (From 30 Jan 2026):
Current Batch: ~40mm diameter (approx. 40–42 bulbs per kg).
Previous Batch (Sold out): ~65mm diameter (approx. 15–17 bulbs per kg).
Note: For packs sold by weight, we weigh each pack carefully and may include loose cloves to ensure you receive the exact weight purchased.

Glenlarge is an Australian-bred subtropical variety developed at Queensland's Gatton Research Station. These day-length neutral bulbs thrive in warm climates without requiring cold winters. Teardrop-shaped bulbs produce 6-12 cloves with white skin and purple blotching. Enjoy sweet, authentic garlic flavour with richer, spicier notes, excellent raw or gently sautéed. The 5.5- to 6.5-month growing cycle allows autumn planting with a late winter harvest. Stores exceptionally well for 7-9 months when properly cured.
📖 Read our Full Garlic Growing Guide Here
All orders ship from our warehouse in Sydney, NSW. We deliver right across Australia, including WA and TAS. We do not ship outside Australia.
On This Page
- Standard Shipping
- Express Shipping
- Processing and Transit Times
- Payment
- Your Shipping Address
- Carriers and Carrier Preference
- Tracking
- Delivery Process and Authority to Leave
- Signature on Delivery - $3.95
- Western Australia and Tasmania
- Transit Speed, Delays, and Service Choice
- Late, Missing, and Damaged Orders
- Replacements and Refunds
- Uncollected Parcels
- Reshipment Costs
- Your Responsibilities
- Limitations and Liability
- Important Notes
- Need Help?
- Frequently Asked Questions
1. Standard Post
Our most popular option. Delivered by Australia Post or courier.
Typical delivery: 4-12 business days for untracked and 3-10 business days for tracked after dispatch. Remote WA and NT may take a bit longer.
| Contents | Price |
|---|---|
| Seeds or supplies up to 200g - Untracked | $3.95 |
| Mixed items 201-400g - Untracked | $5.95 |
| Upgrade to a tracked service | + $3.00 |
| Mixed items 401g - 2kg - Tracked | $10.95 |
| Over 2kg - Tracked & Capped** | $16.95 |
| Signature on Delivery | + $3.95 |
Free shipping does not apply if your order contains any of the following:
- Seed items sold by weight (gram or kilogram, e.g. 1g, 5g, 400g, 1kg)
- Seed potatoes, garlic bulbs, edible produce, berries, or any planting stock
- Large combo or value packs
- Garden tools & bulky items
- Custom seed packets
2. Express Post
For when those seeds simply cannot wait. Delivered by Australia Post or courier.
Typical delivery: 1-3 business days after dispatch. NT, TAS, and remote areas may take a little longer.
| Contents | Price |
|---|---|
| Seed packets only | $16.00 |
| Seeds + bulk up to 500g | $19.00 |
| Bulk seeds 0-500g | $19.00 |
| Bulk seeds 501g - 1kg | $21.00 |
| Bulk seeds 1.01-3kg | $26.00 |
| Bulk seeds 3.01-5kg | $45.00 |
| Bulk seeds 5.01-10kg | $80.00 |
| Bulk seeds 10.01-15kg | $120.00 |
3. Processing and Transit Times
Here is how the timeline works from the moment you hit "Place Order" to the moment your seeds arrive:
Order placed → Processing (2-3 business days) → Dispatch → Transit → Delivery
- We pack orders within 2-3 business days of cleared payment (weekends and public holidays excluded).
- Transit time is in addition to processing and begins on the next business day after we hand your order to the carrier.
- All timeframes are business days (Monday-Friday). Weekends and public holidays do not count.
Transit times after dispatch:
- Express tracked: 1-3 business days (not available for WA)
- Standard tracked: 3-10 business days
- Untracked letter: 4-12 business days
Remote areas (WA, NT, regional) may take longer. Seeds are worth the wait, we promise.
4. Payment
- Credit/debit cards and PayPal: Payment clears instantly, and your order joins the queue straight away.
- Bank transfer: Please allow 2-3 business days for the payment to clear and be verified before your order enters the queue.
- Unpaid orders: If payment is not received within 7 days, we will cancel the order to free up stock for other gardeners.
All orders are subject to acceptance and available stock. In rare cases (such as suspected fraud, pricing errors, or stock issues), we may need to refuse, cancel, or limit orders. An order is officially accepted when it leaves our warehouse.
5. Your Shipping Address
- Please provide a complete and correct shipping address at checkout, including postcode, unit or apartment number, building name, and business name where applicable.
- Our checkout does not include auto-fill or address correction. We recommend giving every field a quick double-check before you submit. Even a small typo in a postcode or unit number can send your parcel on an unplanned road trip.
- Each order is treated independently. We do not refer back to previous orders to check or verify your address. The address you enter on your current order is the one we use, regardless of what you may have entered in the past.
- Collecting from an Australia Post counter (not a PO Box or Parcel Locker)? Please include "C/O Australia Post" in the address field along with the full post office address. Without this, the carrier (other than Australia Post) may not be able to deliver.
- Parcel lockers are not suitable for letter-size orders. If your order ships as a letter (tracked or untracked), it cannot be delivered to a parcel locker. We would need either a PO Box or a physical address.
Need to Change Your Address After Ordering?
We completely understand that mistakes happen. Here is what to know:
- A correction immediately after order placement may be possible, but we cannot guarantee it. Our dispatch team works quickly and does not have access to the customer service inbox, so there may not be enough time to catch the order before it ships.
- Please send address change requests in writing - by email to support@happyvalleyseeds.com.au. We need a written record to make sure nothing slips through the cracks. Phone requests alone are not sufficient for this purpose.
-
Once an order has been packed and dispatched, the address cannot be changed. At that point, it is in the carrier's hands, and we cannot redirect it.
What Happens if an Order Cannot Be Delivered Due to an Address Error
If a carrier returns an order as undeliverable because of an address error, the addressee has moved, or delivery was refused, here are your options:
- Reship: We send it out again, and you cover the actual freight cost (not the capped rate). See Section 15. Replacement orders are sent only after the original has been returned to us and inspected. We need to confirm what happened before we send out a fresh batch. We do not send replacements while the original is still somewhere in the carrier's network.
- Refund: We refund the order minus original shipping, return freight (if charged by the carrier), cost of any perishable items that did not survive the journey, and a 20% restocking fee.
We know this is not the news anyone wants to hear, but we are a small family business, and we cannot absorb the cost of return trips caused by address errors. Getting the address right at checkout saves everyone time, money, and heartbreak.
6. Carriers and Carrier Preference
- We use Australia Post, Aramex, Couriers Please, and Direct Freight Express. We pick the best option for each order based on size, destination, and service availability. Our carrier partners may change from time to time.
- Got a preferred carrier? Let us know right after you place your order, and we will do our best to accommodate. If the cost difference is small, we will absorb it. If it is significant, we will have a chat with you before proceeding.
7. Tracking
- If you selected a tracked service, you will receive a dispatch email with your tracking number. Worth checking your spam or junk folder if it does not turn up.
- Tracking activates only after the carrier scans your order for the first time. This initial scan can take 1-2 business days after we dispatch. Until then, the tracking page may look like nothing is happening. It is. Your parcel is simply waiting for its first scan.
- WA orders: Tracking will show "Pending" until quarantine inspection is complete (up to 10 business days from dispatch). We know it is nerve-wracking, but it is a government process we cannot speed up.
- TAS orders: Minor delay possible while biosecurity paperwork is processed.
- Tracking notifications (SMS, email) are automated by the carrier. We do not control when or how often they send updates.
Untracked Orders
Untracked letters are our most affordable option, and they almost always arrive safely. That said, there are some trade-offs to be aware of:
- No tracking number, no delivery confirmation, and no signature.
- We are unable to provide status updates or investigate lost untracked letters during transit. Once they are in the mail stream, they are beyond our reach.
- The carrier delivers to your letterbox, mailroom, or mail slot. They will not knock on your door or hand-deliver in person.
- Not suitable for parcel lockers or some PO Boxes.
8. Delivery Process and Authority to Leave
Here is how delivery works once the carrier arrives at your address:
- Unless you have selected Signature on Delivery, the carrier has the authority to leave your parcel without a signature. By placing an order without Signature on Delivery, you are giving the carrier the green light to leave it in a safe spot.
- Carriers use their judgement to find a safe place - letterbox, front porch, side entrance, carport, apartment mailroom, business reception, or even with a neighbour.
- Once the parcel has been left at a location the carrier considers safe, neither we nor the carrier is liable if something happens to it after that point. We really do recommend Signature on Delivery if parcel theft is a concern in your area.
If the Carrier Cannot Find a Safe Spot
- They will leave a collection card (physical or digital) and take the parcel to the nearest post office or collection point.
- Parcels are held for approximately 10-14 days. You will need a government-issued photo ID matching the delivery name and address to collect.
- Perishable items (e.g. plants, bulbs, tubers, garlic, seed potatoes): Please collect before the weekend. These items do not enjoy sitting in a warehouse any more than they would enjoy sitting in the sun. We cannot take responsibility for perishables that are not collected promptly.
Proof of Delivery
Standard delivery with Authority to Leave does not provide Proof of Delivery (POD). If you need POD for business records or peace of mind, please select Signature on Delivery at checkout. To obtain POD after a signed delivery, contact the carrier directly with your tracking number.
Where We Can Deliver
Residential addresses (recommended for letter mail), business addresses (please include the business name), PO Boxes, parcel lockers (not suitable for letter-size orders), and rural addresses (allow an extra 2-5 business days).
9. Signature on Delivery
This is our premium delivery option. In an ideal scenario, the carrier will knock, wait, and hand the parcel to a real human before leaving; that's what typically happens.
- Provides personal handover, confirmation of receipt, and Proof of Delivery (POD) documentation.
- Who can sign: Any responsible person at the delivery address - a household member, reception staff, building concierge, or neighbour. The carrier verifies the address, not the identity of the person signing.
- If no one is home, the carrier will not leave the parcel unattended. They will leave a collection card, and the parcel goes to the nearest post office or collection point. You will need a government-issued photo ID to collect.
- Once a signature is obtained at the delivery address, the parcel is considered delivered and all liability transfers to you. This applies even if someone at your address signs without your knowledge - so it is worth giving the household a heads-up when you are expecting a delivery.
- Business addresses: Couriers typically deliver during business hours (Mon-Fri, roughly 9 am - 5 pm). Reception or mail room staff can sign on your behalf, and we are not responsible for what happens to the parcel after it enters your workplace.
A few things Signature on Delivery does not include: guaranteed delivery by a specific date or time, delivery to a specific named person, age verification, insurance, weekend or after-hours delivery, or guaranteed multiple attempts. Carriers typically make 1-2 attempts only.
10. Western Australia and Tasmania
We love our WA and Tassie gardeners. Unfortunately, state biosecurity rules add a few extra steps (and a bit of extra time) to getting your seeds to you.
Western Australia
- Quarantine fee: $6.00 per order. This is a mandatory government fee, not something we pocket. It shows at checkout. If your order qualifies for free shipping, the $6 you see is the quarantine fee, not a sneaky shipping charge.
- Dispatch schedule: WA orders are packed each Thursday and dispatched on Friday. To make that week's batch, please order before Wednesday 11:59 PM Sydney time.
- Inspection: Every WA seed order goes to Quarantine WA (DPIRD) at Perth Airport for mandatory inspection. We cannot skip, rush, or sweet-talk this process.
- Tracking: Stays in "Pending" until inspection is complete - which can take up to 10 business days from dispatch. We know the wait is tough.
- Delivery after clearance: 1-5 business days (tracked) or 5-12 business days (untracked) within WA.
- Express not available: Quarantine adds days regardless, so Express simply does not make sense for WA orders.
Tasmania
- Biosecurity fee: $3.00 per order to cover Biosecurity Tasmania paperwork.
- Quantity limit: Maximum 1 kg per seed line item.
- Some varieties cannot be shipped to TAS due to biosecurity restrictions.
- Biosecurity Tasmania may occasionally inspect shipments at the point of entry, which can add a small delay.
11. Transit Speed, Delays, and Service Choice
We want to be upfront with you about something that comes up often:
- Once your order leaves our warehouse, we have no control over how fast it travels. The carrier handles all the routing, handling, and delivery from that point. We cannot ring them up and ask them to drive faster.
- The speed of delivery depends on the service you selected at checkout. Express is the fastest (1-3 business days). Standard and untracked letters are slower by design and priced accordingly. We leave this choice entirely in your hands.
- After dispatch, we cannot influence, expedite, or prioritise your delivery through the postal or courier network. We wish we could.
- Delivery times are estimates, not guarantees. Carrier delays, weather, public holidays, quarantine processing, and industrial action can all slow things down. These events are beyond our control.
- A delayed order is not a lost order. We will not issue a refund or replacement simply because an order did not arrive by a particular date. If you believe your order may genuinely be lost, please check the timeframes in Section 12 before getting in touch.
12. Late, Missing, and Damaged Orders
The vast majority of orders arrive without a hitch. On the rare occasion something goes sideways, here is how we handle it.
When to contact us about a missing order:
- Standard / Untracked: Not received within 20 business days of dispatch
- Express: Not received within 5 business days beyond the carrier's estimated delivery time
- WA orders: Not received within 25 business days of dispatch (to account for quarantine)
Before contacting us: Please check your tracking information (if provided) and check with your local Australia Post delivery centre or courier collection point. If still missing after the timeframes above, get in touch with your order number and any tracking details. We are here to help.
Damaged Parcels
If a parcel arrives looking like it has been through a rough patch:
- Photograph the damaged packaging before opening.
- Open carefully and photograph any damaged items inside.
- Contact us within 3 business days with your order number, photos, and a description of the damage.
- Please keep all packaging until we have resolved the issue.
13. Replacements and Refunds
If your order is genuinely lost or damaged in transit, we will work with you to find a fair outcome. Here are the important details:
- If we do send a replacement, that replacement is final and travels at your own risk. No further refund or replacement will be provided for the replacement order.
- Delivery delays alone do not qualify for a refund or replacement. Running late is frustrating, but it is not the same as being lost. Please refer to the timeframes in Section 12 to check whether your order qualifies as missing.
14. Uncollected Parcels
If your parcel ends up at a post office or collection point and is not picked up within the holding period (typically 10-14 days), the carrier sends it back to us. When that happens, we will need to pass on the following costs:
- Return freight costs, if the carrier charges us
- Replacement cost of any perishable items that did not survive (plants, bulbs, tubers, garlic, seed potatoes)
- Actual freight costs if you would like it reshipped (not the capped rate) - see Section 15
The easiest way to avoid this: Keep an eye on your tracking, set a reminder if needed, and collect promptly. For anything perishable, please collect before the weekend.
15. Reshipment Costs
If your order is returned to us for any reason (wrong address, refused delivery, not collected, addressee unknown) and you would like it sent again, the reshipment will be charged at the full actual postage cost from the carrier, not the capped rate you originally paid.
- This applies regardless of fault. We would love to absorb it twice, but as a small business, we simply cannot.
- We will always quote you the actual cost before we process the reshipment, so there are no surprises.
- Alternatively, you can request a refund: We will refund the order minus original shipping, return freight (if charged to us), cost of any perished items, and a 20% restocking fee.
16. Your Responsibilities
We do everything we can on our end to get your seeds to you quickly and safely. There are a few things we need from you to make that happen:
- Accurate address: This is the big one. Please see Section 5 for the full details. We use automated label generation and may not be able to catch address errors before dispatch.
- Valid contact details: A working phone number and email address so we (and the carrier) can reach you if needed.
- Safe delivery environment: Please restrain pets, clear pathways, and make sure the carrier can safely reach your door. If a carrier feels unsafe, they may skip your address entirely and take the parcel to a collection point. We are not responsible for delays or redelivery fees in those situations.
- Monitor your tracking: Once we dispatch, keeping an eye on tracking is over to you.
- Collect promptly: If a collection card is left, please pick up your parcel within the holding period (10-14 days). For perishables, before the weekend.
- Inspect on arrival: Give your parcel a quick once-over when it arrives. If something looks damaged, let us know within 3 business days.
- Choose the right service: If speed or tracking matters to you, please select a tracked or Express service at checkout. We leave the shipping choice in your hands and cannot upgrade a service after the order is placed.
17. Limitations and Liability
We are not fans of fine print, but here are a few things that are important for both of us to be clear on:
- Transfer of risk: Once the carrier confirms delivery (whether to your address, a safe place, or a collection point), responsibility for the parcel passes to you. After that point, we are not liable for theft, weather damage, or loss.
- Carrier delays: All delivery timeframes are estimates, not guarantees. We are not responsible for carrier delays, weather events, public holidays, industrial action, routing decisions, incorrect carrier delivery, or lost untracked letters. We wish we had more control here, but we genuinely do not.
- Force majeure: If something truly extraordinary happens (natural disasters, pandemics, government restrictions, quarantine changes, carrier strikes, supplier shortages, technology failures), we are not liable for delays or inability to fulfil orders. We will always do our best to keep you informed and get things moving as soon as we can.
- Tracking notifications: These are automated by the carrier. We have no control over when, how often, or how accurately they send updates.
18. Important Notes
- We process orders only after payment clears. No payment, no packing.
- Postage rates are per order and may change without notice as carrier prices shift. The rate you see at checkout is the rate that applies to your order.
- Shipping charges are not discounted during sales or promotions. The sale is on the seeds, not the postage.
- If you place multiple separate orders to the same address, we may combine them into one shipment. Only the highest applicable shipping tier is charged. If you want everything in one package, the easiest way is to place one order.
- All timeframes are business days (Monday-Friday, excluding public holidays and our closure periods).
- Items may sell out. If anything in your order is unavailable, we will let you know.
- Your shipping details are shared with carriers solely for delivery purposes. See our Privacy Policy for the full picture.
19. Need Help?
We are a real team of real people, and we are happy to help.
Email: support@happyvalleyseeds.com.au
Hours*: Mon-Fri, 8 am - 5 pm NSW time (AEDT/AEST)
Address: PO Box 148, Riverstone NSW 2765
ABN: 63 634 537 492
* Not available on NSW and National Public Holidays.
20. Frequently Asked Questions
Do you ship outside Australia?
No. Australia only, sorry. Biosecurity regulations make international seed shipping a headache for everyone involved.
How long does Standard delivery take?
3-12 business days after dispatch. Remote WA and NT may take longer. Transit time starts from when the carrier picks up your order, not from when you place it.
How long does Express delivery take?
1-3 business days after dispatch. NT, TAS, and remote areas may take a bit longer. Not available for WA.
Why does my tracking show no activity?
Do not panic. Tracking only activates after the carrier scans your order for the first time, which can take 1-2 business days after dispatch. For WA orders, tracking sits in "Pending" until quarantine inspection is complete (up to 10 business days). Your parcel is on its way - it just has not checked in yet.
Do WA orders have delays?
Yes, unfortunately. All WA seed orders go through mandatory quarantine at Perth Airport. Allow up to 10 business days for inspection, then 1-5 business days for delivery within WA. We wish it were faster.
Can I get a signature on delivery?
Absolutely. Add Signature on Delivery for $3.95 at checkout. Great for peace of mind or if you live in an area where parcels tend to wander off.
Can I change my address after ordering?
Maybe, but please be quick. Email us in writing straight away. Changes are only possible if the order has not yet been dispatched, and even then, we cannot guarantee it. See Section 5 for the full details.
I used the wrong address. What happens?
Because we use automated label generation, we may not catch the error before the order ships. If the carrier returns the parcel to us, you will be charged actual reshipment costs. See Section 5 and Section 15.
Why was I charged $6 when my WA order qualifies for free shipping?
That $6 is the mandatory WA quarantine inspection fee set by the government, not a shipping charge from us. It applies to every WA order regardless of order value.
My order is late. Can I get a refund?
We completely understand the frustration, but delivery delays alone do not qualify for a refund or replacement. Once an order leaves our warehouse, the transit speed is entirely in the carrier's hands. If your order meets the "missing" thresholds in Section 12, please get in touch, and we will sort it out.
When do you send a replacement?
Only after the original has been returned to us and we have checked its contents. We do not send a replacement while the original is still somewhere in the postal network. See Section 13.
When is an order considered missing?
Standard/Untracked: 20 business days after dispatch. Express: 5 business days beyond the carrier estimate. WA: 25 business days. See Section 12.
What if someone steals my parcel after delivery?
Once the carrier confirms delivery, risk passes to you. If theft is a concern, Signature on Delivery ($3.95) is well worth the investment. Mail theft is a criminal offence and should be reported to your local police and Australia Post.
What happens if I do not collect my parcel?
The carrier returns it to us after 10-14 days. You will be charged return freight (if any) and actual reshipment costs if you want it sent again. Any perishable items that did not survive the wait will incur replacement costs too. See Section 14.
Can I request a specific carrier?
Sure, let us know right after ordering. We will do our best. If the cost difference is minor, it is on us. If it is substantial, we will have a quick chat with you first.
Can I choose a faster delivery after ordering?
Unfortunately not. Once an order is placed, the shipping service is locked in. For future orders, select Express at checkout if speed is a priority.
Thank you for supporting our small family business. Now go get your hands dirty - happy gardening!
Shipping Restrictions
Western Australia Customers: We can ship most seed line items, except Quarantine WA restricted seed lines to WA. To help us ship your order as quickly and efficiently as possible, please do not include any seed items prohibited in WA; they are listed with the label 'NOT to WA'. Due to quarantine restrictions in WA, there is a 10kg seeds limit per variety. WA orders require additional handling time. Please remain within an approved limit when ordering seeds. We review every WA order before dispatch and remove (or reduce) excess seed quantity from your order to comply with WA biosecurity regulations. Please check further information here
Tasmania Customers: We can ship seeds to Tasmania. Please do not include seed line items labeled 'NOT to TAS'. Please note that the maximum allowable limit per permitted seed line item is 1kg per order.