
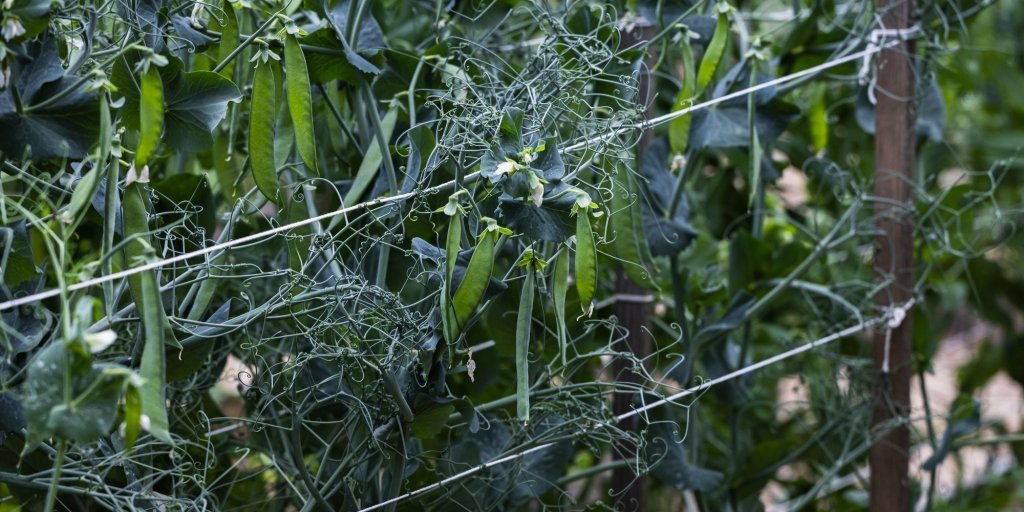
Why peas are worth a bed
The sugars in a fresh pea begin turning to starch within hours of picking, which is why a homegrown pea tastes sweeter than one that has travelled to a shop. Peas are also one of the easiest cool season crops to grow at home, in the ground or in a large pot, and the whole job comes down to sowing them in the right spot at the right time. Fresh peas are a useful plant protein as well.
Pisum sativum is a climbing annual legume that carries nitrogen fixing bacteria in nodules on its roots, so a pea bed usually leaves the soil in better shape than it found it. Browse the full range in our pea seeds collection.
Types of peas
Not every pea is a shelling pea. Choosing the type first makes everything else simpler, particularly when to pick.
Shelling peas
Shelling peas, sometimes called English peas, carry round peas inside a pod that is too tough to eat. The pods take on a waxy sheen as they fill. Telephone, also sold as Alderman, is a tall old favourite, and Novella Leafless, Purple Podded and Massey Gem are all worth a row.

Sugarsnap peas
Sugarsnap peas have a thick, sweet, edible pod and are eaten whole, raw or briefly cooked. Pick them once the pod is round and crisp, before the skin turns leathery. Cascadia and Bon are reliable, and both bush and climbing forms are available.

Snow peas
Snow peas are grown for a flat, tender pod. Pick them at about 5 to 7cm long while the pod is still flat and before the seeds inside start to swell, because the pod turns stringy once the peas fill out. Oregon Sugar Pod and Yukamo Giant are both easy to grow.

Dried peas
Bought split peas are dried field peas that have been hulled and split, but you can also dry shelling peas at home for soup by leaving them on the bush until the pod turns tan and papery. Shell them, dry them thoroughly, then store them in a sealed jar.
When to sow peas
Peas are a cool season crop. The seed germinates best in soil of about 15 to 25°C and slowly in colder soil, flowers drop in heat, and a hard frost can damage young plants and open flowers, so the aim is a crop that flowers in mild weather. These are the sowing windows for the six Australian zones.
- Tropical (Darwin, Cairns, Townsville, Mackay, Broome, the Top End and the far north): Jun-Jul only, in the coolest and driest weeks. Peas are marginal here, and a quick bush type is the better bet.
- Subtropical (Brisbane, the Gold and Sunshine coasts, Bundaberg, Coffs Harbour, Lismore and the NSW north coast): Apr-Jul.
- Arid and semi-arid (Alice Springs, Broken Hill, Kalgoorlie, Longreach, Mildura, Port Augusta and most of the inland): Apr to early Aug.
- Temperate (Sydney, Melbourne, Newcastle, Wollongong, Geelong and most of coastal southern Australia): Mar-Aug, with the last main sowing in Aug.
- Mediterranean (Perth, Adelaide, the south west of Western Australia and the South Australian gulf country): the same months as temperate, Mar-Aug. Summer comes on dry here, so sow early enough for the crop to fill before the heat, and keep the water up through a dry autumn.
- Cool and alpine (Hobart, Canberra, Ballarat, Katoomba, Armidale, the tablelands and the alpine districts): Aug-Oct is the main window, once the worst frosts have passed. Milder pockets can also sow in late Feb and again in Apr and May for a crop that stands through winter, although in frosty spots those sowings often rot in cold, wet soil.
These are broad groupings. If you garden between two zones, or well above the nearest town, lean on your own local frost dates rather than the map.
How to grow peas in the garden
- Pick a sunny spot with soil that drains freely. Peas resent sitting in wet ground, and both heavy clay and loose sand improve with compost dug through.
- Prepare the bed about five weeks ahead with compost or well rotted manure so it has time to settle. Peas fix their own nitrogen, so skip high nitrogen feeds, which give plenty of leaf and few pods.
- Keep peas on a three to four year rotation. Do not follow peas with peas, or with broad beans, in the same bed.
- Coating the seed with a legume inoculant before sowing can help nodules form, particularly in a bed that has not carried legumes before.
- Moisten the soil, then sow the seed 2.5cm deep. Sow bush and dwarf types about 5cm apart in the row and thin to 8 to 10cm. Tall climbing types want 10 to 15cm along the trellis. Allow 45 to 60cm between rows of bush peas and about 75cm between rows of climbers.
- Do not water again until the shoots appear. Pea seed rots easily in cold, wet soil.
- Put the support in at sowing time. Tall climbing types, including many snow peas and sugarsnaps, need a trellis, netting or brushwood, while bush and dwarf types are steadier with a few twiggy sticks.
- Mulch the base with sugar cane or pea straw to hold moisture. Water deeply rather than often, and water at the base instead of over the leaves.
- Once flowering starts, a seaweed tonic every two to three weeks is enough. Save the nitrogen for the crop that follows.
- Sow a short row every two to three weeks for a longer picking season.
Picking
Pick every two or three days once the crop comes on. Regular picking keeps the plant flowering, while pods left to fill and dry tell it the season is over. Shelling peas are ready when the pod is plump and still bright green, snow peas while the pod is flat, and sugarsnaps when the pod is round and crisp.
How to grow peas in a pot
- Choose a pot about 600mm wide and at least 300mm deep and stand it in full sun. Bush and dwarf types suit pots best.
- Fill it with a good quality potting mix with some compost worked through.
- Sow the seed 2.5cm deep, then hold off watering until the shoots appear.
- Set a trellis or a few stakes in place before the tendrils start reaching.
- Pots dry out faster than beds, so check the top few centimetres daily in warm weather.

Pests and diseases
Start with a variety suited to your area, a bed that has not grown peas for a few years, and enough room for air to move.
Powdery mildew
Powdery mildew is the common one, a white dusting on the leaves in warm, still weather towards the end of the season. Space the plants so air moves through, water at the base in the morning, and choose a resistant variety if it turns up every year. A late crop pushed into the heat will usually get it.
Fusarium wilt
Fusarium wilt is soil borne rather than an airflow problem. Plants yellow from the bottom up and wilt even in moist soil, and no spray will fix it. Rotate the bed, choose resistant varieties, and avoid carting soil from an affected bed around the garden.
Aphids and viruses
Aphids cluster on the growing tips and can spread viruses such as bean leafroll and pea seed borne mosaic, which mottle and stunt the plants and cut the yield. Knock small numbers off with a jet of water and leave ladybirds, hoverflies and lacewings to the rest. Pull out badly affected plants, because a virused plant does not recover. If an infestation is genuinely beyond that, use an APVMA-registered product for that pest, exactly as the label says, and apply at dusk when bees are not flying.
Pea weevil
Pea weevil (Bruchus pisorum) lays on young pods, and the grub develops inside the seed and leaves a round exit hole. It matters most if you save your own seed. Freezing dry saved seed for a week before storing it kills any grubs inside.
Slugs, snails and birds
Snails and slugs take the seedlings and birds pull up sprouting seed. Cover new sowings with netting or a cloche until the plants are up and climbing.
Related growing guides
- Pea Weevil: How to Protect Your Peas and Saved Seed
- Powdery mildew, blossom end rot and other common vegetable troubles
- What to grow in winter: cool-season vegetables across Australia
Ready to plant? Browse our pea seeds.