
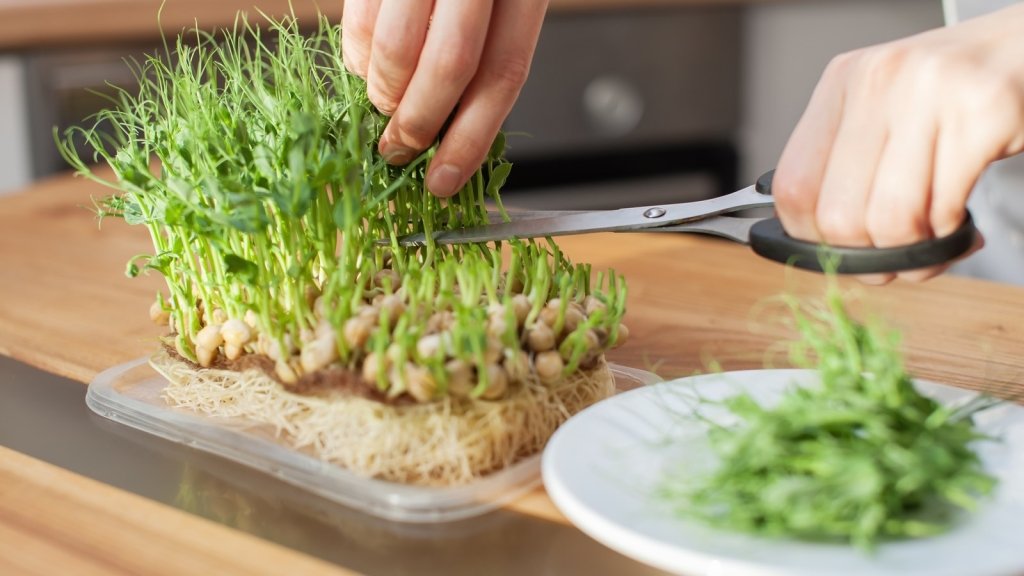
The short version: Microgreens are seedlings cut at the first leaves, one to three weeks after sowing, and they are the quickest, smallest-space crop there is. Sow seed sold for sprouting or microgreens thickly over 3 cm of moist seed-raising mix or coir in a shallow tray, cover it for a few days, then give it at least five hours of light a day, mist or bottom-water so it never sits wet, and snip the shoots just above the mix at 2 to 6 cm tall. Radish, mustard, rocket, broccoli, pea and sunflower are the easiest. Never grow tomato, potato, capsicum, chilli or eggplant microgreens, whose leaves are toxic, keep trays clean and airy to avoid mould, and treat the raw shoots with the same care as any raw salad.
A tray on a windowsill can put a fistful of intensely flavoured greens on the table every week of the year, with no garden at all. Microgreens are also the most forgiving thing a beginner can grow, as long as a few habits around light, water and cleanliness are in place from the first tray.

What microgreens are, and what they are not
Microgreens are ordinary vegetable and herb seedlings grown densely in a growing medium and cut once the seed leaves, or the first true leaves, have opened, usually 7 to 21 days after sowing and up to about four weeks for the slowest crops. Sprouts are different: they are germinated in a jar with no medium, in the dark, and eaten whole, root and all, within a few days. Baby leaf salad is the same seedlings grown on for another few weeks at wider spacing. The distinction matters for food safety, covered below, because sprouts grown warm and wet in a jar are a higher-risk food than a tray of shoots grown in light and air.
Which seeds to use
Start with the fast, easy brassicas and their friends: radish, mustard, rocket, broccoli, kale, red cabbage and mizuna. They are up in days and peppery on the plate. Pea shoots and sunflower shoots are larger, sweeter and worth the extra step of soaking the seed overnight. Beetroot, coriander, basil, amaranth, fennel and dill are slower but beautiful. Almost anything whose leaves you would eat at maturity can be grown as a microgreen. The exception is absolute: never grow the nightshade family, tomato, potato, eggplant, capsicum and chilli, because their foliage is toxic at every stage. Use seed sold specifically for sprouting or microgreens, which is untreated and packed in the quantities you need, rather than garden seed, which may carry a fungicide dressing not meant for eating and comes in packets far too small for a tray.

What you need
- A shallow tray or punnet with drainage holes, plus a second solid tray or saucer to sit it in.
- Seed-raising mix or coir, ideally a fresh, sterile bag; a few layers of paper towel in the base help hold moisture.
- A spray bottle, a small watering can or a jug for bottom watering.
- A sunny windowsill, a bright verandah or a simple grow light.
- Sharp, clean scissors.
Open the bag of mix with a mask and gloves on, dampen it before you handle it, and wash your hands afterwards. Bagged potting and seed-raising mix can carry the bacterium Legionella longbeachae, which causes a serious lung infection when inhaled, and the precaution takes ten seconds.
Sowing and growing, step by step
1. Fill and firm
Fill the tray with about 3 cm of mix, level it, firm it gently and water until it is evenly moist but not dripping.
2. Sow thickly
Scatter seed densely and evenly across the surface, far more thickly than you would in the garden, but ideally not piled on top of each other, which invites rot. Small seed such as mustard and rocket can be sown as is; soak peas and sunflowers overnight first. Press the seed into the surface. Fine seed needs no covering; larger seed can take a light dusting of mix.
3. Cover for a few days
Mist the surface, then cover the tray with a lid, a second upturned tray or a sheet of cardboard for two to four days. The darkness and humidity even out germination, and the light weight of an upturned tray helps pea and sunflower shoots push up straight. Check daily and lift the cover as soon as most seed has sprouted.
4. Give it light
Once uncovered, the shoots need at least five hours of good light a day or they stretch into pale, weak, tasteless threads. A north-facing windowsill in winter or a bright verandah out of direct summer sun is fine; a cheap grow light makes the result far more reliable in a dim kitchen.
5. Water from below or mist
Keep the mix moist, never waterlogged. Misting works for the first days; afterwards, pouring water into the solid tray underneath and letting the mix drink for ten minutes keeps the foliage dry and discourages mould. Tip out whatever is not absorbed.
6. Harvest
Cut with scissors just above the mix once the seed leaves have expanded or the first true leaves show, typically at 2 to 6 cm tall and 7 to 21 days after sowing, depending on the crop. Radish and mustard are fastest; coriander and beetroot are slowest and can take closer to four weeks. Rinse gently, dry on a clean tea towel or in a salad spinner, and eat within a few days from the fridge. Most trays give one cut; pea shoots often regrow for a second.

Problems and how to prevent them
Fuzzy white growth at the base of brassica and grain shoots in the first days is usually root hairs, not mould. Root hairs flatten and vanish when misted and have no smell; mould is grey or webby, spreads across the surface and smells musty. Real mould and damping off, where shoots collapse at the base, come from the same three causes: too much water, too little airflow and seed piled too thickly. Sow a little thinner, water from below, keep the tray somewhere air moves, and throw away a mouldy tray and its mix rather than trying to save it. Leggy, pale shoots mean too little light. Bitter or tough shoots were left too long; cut earlier next time. Between trays, wash and dry the containers thoroughly and use fresh mix every time; the old mix goes to the compost.
Keeping microgreens safe to eat
Raw sprouts have caused Salmonella outbreaks in Australia, including two traced to alfalfa sprouts in the mid 2000s, and Food Standards Australia New Zealand classes raw seed sprouts as a higher-risk food for pregnant women, the elderly and anyone with a weakened immune system, and the Food Safety Information Council spells it out: people over 70, young children, pregnant women and the immune-compromised should eat sprouts only cooked, because washing does not reliably remove bacteria that have lodged in the tissue. The main pathogens of concern are Salmonella, toxin-producing strains of E. coli and Listeria, and Listeria, which can multiply in the fridge, is the particular concern in pregnancy. Microgreens grown in a medium, in light and air, and cut above the roots are generally thought to carry less of that risk, though no food safety authority has issued a separate classification for them, and they are still eaten raw, so the same common sense applies: buy clean seed intended for the purpose, use fresh mix and clean trays, keep the foliage dry, refrigerate promptly, and anyone in a vulnerable group should either skip raw microgreens altogether or cook them through in a hot dish rather than sprinkling them on at the end. Our guide to broccoli and alfalfa sprouts covers the jar method and its rules.

Microgreens across Australia's climate zones
- Tropical (Cairns and far north Queensland, Darwin and the Top End of the Northern Territory, the Kimberley in Western Australia): heat and humidity make mould the main problem. Grow indoors under a fan or air conditioning, water from below only, and harvest early.
- Subtropical (Brisbane and coastal Queensland, Coffs Harbour and northern New South Wales): shaded, airy verandahs work most of the year; move trays indoors in the wet season.
- Arid and semi-arid (inland Queensland, Broken Hill and Dubbo in New South Wales, Mildura in Victoria, inland South Australia and Western Australia, Alice Springs in the Northern Territory): trays dry out fast, so bottom water daily in summer and keep them out of hot direct sun; winter windowsills are ideal.
- Temperate (Sydney and New South Wales, Melbourne and Victoria): a north-facing windowsill grows microgreens all year, with a grow light useful in a Melbourne winter.
- Mediterranean (Perth and southern Western Australia, Adelaide and the Adelaide Plains in South Australia): easy in every season; keep summer trays out of the afternoon sun and away from hot winds.
- Cool and alpine (Hobart and Tasmania, Canberra and the ACT, Ballarat in Victoria, Orange and Armidale on the New South Wales tablelands, and the alpine country of the Snowy Mountains and the Victorian high country): the best winter crop there is when the garden is frozen; a sunny window and a heat mat under the tray speed germination.
Wherever you are, the tray in the kitchen is the same tray, which is the whole appeal.
Frequently asked questions
Are microgreens really more nutritious than the mature vegetable?
Laboratory studies often find higher concentrations of some vitamins and plant pigments in microgreens, sometimes many times higher, but results vary hugely by crop and growing conditions, and you eat them by the handful rather than the plateful. Grow them for flavour and freshness and treat the nutrition as a bonus.
Can I use garden seed?
Only if it is untreated, and it is an expensive way to fill a tray. Seed sold for sprouting or microgreens is cheaper by weight and packed for the purpose.
Can I regrow a tray after cutting?
Pea shoots often give a second cut. Most others do not; compost the mix and start again.
Why did my tray go mouldy?
Too wet, too crowded or too still. Water from below, sow a little thinner and give the tray some airflow.
A packet of seed, a tray of mix and a windowsill are the whole investment, and the first harvest is a fortnight away. For the food safety detail, the Food Safety Information Council's notes on sprouts set out who should avoid raw sprouts and why.
Related growing guides
- Broccoli Sprouts vs Alfalfa Sprouts: Nutrition, Taste, and How to Grow
- The Sulforaphane Guide: Why Broccoli Sprouts Are the Most Nutritious Thing You Can Grow
- Herbs on a Sunny Windowsill: Fresh Pickings All Year
Sow a tray this week: browse our sprouting and microgreen seeds, radish sprouting seeds and bulk sprouting seeds.