
Description
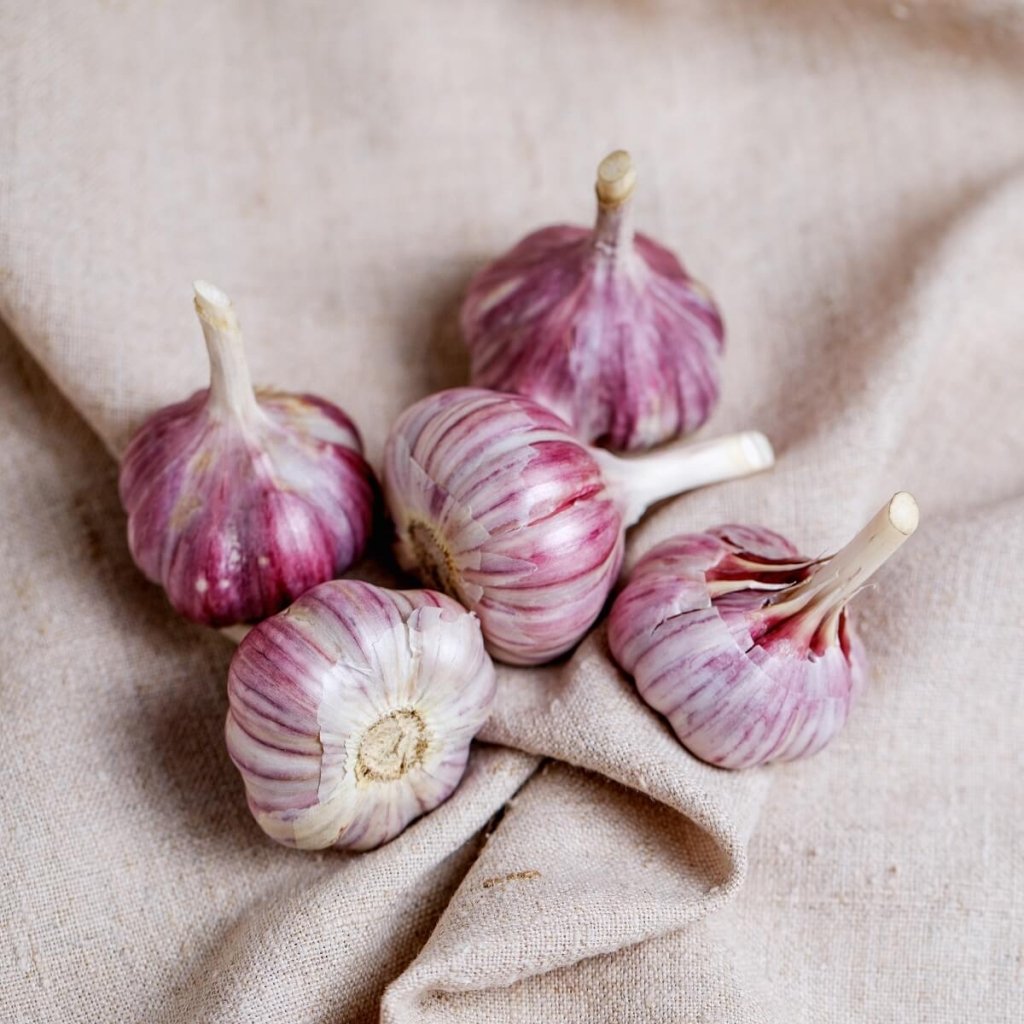
Garlic - Glamour (2, 4 or 8 Bulbs)
Allium sativum
NOT to WA & TAS
Glamour is a striking turban variety showcasing vibrant purple bulbs with deeper purple striping. These medium to large bulbs produce 8-11 plump cloves with a pleasantly hot, spicy flavour that transforms to sweet richness when cooked. A weakly bolting hardneck, Glamour thrives across southern Australia from NSW to Tasmania, performing exceptionally well in cold climates with heavy soils. Early planting and mid-to-late spring harvest. Stores 4-5 months when properly cured. Delivers robust garlic character for discerning home cooks.
Growing Guide
Glamour is a turban group garlic that excels across southern Australia's diverse climates, from coastal NSW through Victoria to Tasmania, South Australia, and southern Western Australia. Named by Patrice Newell of Elmswood Farm in NSW, this variety has proven particularly outstanding in challenging cold-climate conditions with heavy volcanic soils and low pH, making it ideal for regions like Ballarat, the Southern Highlands, and Tasmania's midlands.
Climate & Site Selection As a weakly bolting hardneck, Glamour appreciates cool to cold winters followed by hot, dry summers, the classic temperate garlic climate. Unlike strongly bolting hardneck varieties, Glamour doesn't always produce a full scape, particularly in warmer regions, making it adaptable across varied conditions. It tolerates some humidity better than many hardnecks, extending its growing range into moderately humid coastal and inland areas.
Choose a position with full sun exposure (6-8 hours minimum daily). While Glamour tolerates less-than-perfect soils better than some varieties, it still requires good drainage. It has proven itself in heavy volcanic soils where other varieties struggle, provided drainage is adequate. In clay-heavy soils, create raised beds 15-20cm high to prevent waterlogging during winter rains.
Soil Preparation Prepare beds 3-4 weeks before planting. Glamour responds well to thorough soil preparation:
Work in generous quantities of well-aged compost or manure to 20-30cm depth, this improves structure in heavy soils while adding fertility. For low pH soils (which Glamour tolerates well), test pH and consider liming if below 5.5, though this variety performs adequately in the 5.5-6.5 range where some varieties struggle.
Add a complete organic fertiliser or blood and bone at the manufacturer's recommended rate. In heavy volcanic soils, incorporate gypsum (500g per square metre) to improve soil structure without raising pH. Glamour's proven performance in challenging soil conditions makes it an excellent choice for gardeners dealing with difficult ground.
Planting Plant Glamour cloves in April across southern Australia, this early planting timing is critical for optimal bulb development. In cooler regions like Tasmania or high-altitude areas, planting can extend into early May, but don't delay past mid-May or bulbs won't develop fully before summer heat arrives.
Separate bulbs into individual cloves 24-48 hours before planting. Select only the largest, healthiest cloves from disease-free bulbs. Glamour typically produces 8-11 good-sized cloves per bulb, giving you excellent seed stock for subsequent seasons.
Plant cloves 5-8cm deep with the pointed end facing upward. Space cloves 15cm apart in rows 30-35cm apart. The 15cm within-row spacing prevents crowding as the medium to large bulbs develop, while the wider row spacing facilitates air circulation, important for preventing fungal issues in humid conditions.
Mark row ends clearly with variety names and planting dates, Glamour's early harvest timing differs significantly from mid-season varieties, and you'll want to monitor it separately.
Watering Consistent moisture throughout the growing season is critical for Glamour, water stress causes plants to weaken and fall over prematurely, reducing bulb size and quality. This variety is particularly sensitive to water deficiency compared to some garlics.
Water deeply 1-2 times weekly during active growth (May through September), providing 25-30mm each time. Deep watering encourages strong root development and keeps plants upright. In areas with winter rainfall, supplement only during dry spells, but monitor soil moisture closely, Glamour suffers quickly when allowed to dry out.
Spring watering becomes crucial as temperatures rise and bulbs size up rapidly in October. Continue regular deep watering through early November, reducing frequency only in the final 2-3 weeks before harvest once lower leaves begin yellowing.
Unlike some varieties that benefit from complete water cutoff before harvest, Glamour's sensitivity to water stress means you should maintain light moisture right up to 1-2 weeks before harvest. Complete drying out can cause premature plant collapse, making harvest timing difficult.
Fertilising Apply nitrogen-rich fertiliser 4-6 weeks after planting (late May/early June) to support vigorous leaf development. Blood and bone, aged poultry manure, or fish emulsion work well. Water in thoroughly after application.
Make a second nitrogen application 8-10 weeks after planting (mid-July) as plants enter their peak growth phase. This supports the 10-12 leaves Glamour typically produces—each leaf creates one layer of bulb wrapper.
Switch to potassium-rich fertiliser in late August/early September as bulbs begin forming. Wood ash, potash, or complete organic fertilisers with higher potassium ratios support bulb development without encouraging excessive late-season foliage growth. Avoid high-nitrogen fertilisers after early September, they delay bulb maturation and reduce storage life.
Mulching Apply 5-8cm of organic mulch after planting. Pea straw, lucerne hay, or sugar cane mulch work excellently, suppressing weeds while moderating soil temperature through winter cold and spring heat. Mulch also maintains the consistent soil moisture that Glamour requires to prevent premature plant collapse.
Keep mulch pulled back 2-3cm from stems to prevent collar rot, particularly important in humid regions where Glamour's tolerance for moisture can work against it if conditions remain too wet around the neck.
Refresh mulch in late winter (August) if it has decomposed significantly. Fresh mulch going into spring helps maintain soil moisture during the critical bulb development phase.
Pest & Disease Management Glamour shows reasonable disease resistance but benefits from preventive practices:
Rust: Orange-brown pustules on leaves indicate rust fungus. Ensure excellent air circulation through appropriate spacing, avoid overhead watering, and remove affected leaves promptly. Organic copper or sulphur sprays can control severe outbreaks.
Downy Mildew: In humid conditions, grey-purple fuzzy growth may appear on leaves. Improve air circulation, ensure plants aren't water-stressed (which increases susceptibility), and remove affected foliage.
Thrips: Tiny insects causing silvery leaf streaking. Monitor regularly and spray with organic insecticidal soap if populations build. Well-watered, healthy plants show better resistance.
White Rot: This soil-borne fungal disease causes yellowing foliage and rotting bulbs. Practice 3-4 year crop rotation, never planting garlic, onions, leeks, or shallots in the same location within this timeframe.
Scape Management As a weakly bolting hardneck, Glamour's scape production varies:
- In cool climates: Usually 100% of plants produce scapes
- In warmer climates: Some plants produce full scapes, some produce weak scapes that don't fully develop, and some produce no scape at all
When scapes appear (typically October in southern regions), monitor their development:
- Full scapes: Remove when they form a 180-degree loop or begin straightening (usually 1-2 weeks after emergence). Cut at the point where the scape meets the top leaf, using a sharp blade. This directs energy to bulb development and prevents the hollow scape from becoming a disease entry point.
- Weak scapes: These often emerge but remain short and floppy without forming a proper loop. Remove them when they're 15-20cm long.
- No scape: Some plants simply won't produce scapes in warmer conditions. This is normal for weakly bolting varieties and doesn't affect bulb quality.
Harvest scapes when young and tender, they're delicious in stir-fries, pesto, and sautés.
Critical Timing Considerations Glamour's harvest timing is notoriously narrow—this variety goes from "almost ready" to "past perfect" in just a few days, especially in warmer, more humid regions. Begin monitoring plants closely from early November onwards, checking daily once lower leaves start yellowing. Split bulb skins are common if harvest is delayed even 3-4 days past optimal timing.
Harvest & Storage
When to Harvest Glamour matures mid-to-late November in most southern Australian regions, an early harvest compared to mid and late-season varieties. This early maturity makes Glamour valuable for extending the fresh garlic season, providing homegrown bulbs before most other varieties are ready.
The harvest window for Glamour is critically narrow. Unlike varieties offering a 1-2 week harvest window, Glamour can go from perfectly mature to oversplit skins in just 3-5 days, particularly in warmer conditions or humid weather. This rapid maturation requires vigilant monitoring.
Monitoring for Maturity: Begin checking plants in early November, increasing inspection frequency as lower leaves yellow. Check daily once maturation signs appear:
Key maturity indicators:
- Lower 4-5 leaves have turned yellow or brown
- Upper 5-6 leaves remain green (avoid waiting for all leaves to die back)
- The pseudostem feels slightly soft when gently squeezed near the bulb
- Scape (if present) has dried and begun falling away from the plant
- Plants may begin leaning or showing weakness, particularly common in Glamour
Test bulb excavation: When lower leaves begin yellowing, carefully excavate soil from around 1-2 bulbs without lifting them completely:
- Check that bulbs have reached medium to large size (5-7cm diameter)
- Verify the flattened round shape is fully formed
- Confirm individual cloves are well-defined and plump
- Ensure wrapper layers are developing but haven't split
- Check that the papery outer skin is beginning to form
If these conditions aren't met, recover the test bulbs and check again in 2-3 days. Once one section of the planting shows readiness, the entire crop typically matures within 3-5 days, Glamour matures very uniformly.
The Split Skin Challenge: Glamour's primary harvest challenge is its tendency to develop split bulb skins if harvest is delayed. Split skins occur when:
- Harvest is delayed beyond optimal maturity
- Weather turns warm and humid during the final maturation phase
- Bulbs continue sizing while papery wrappers don't expand
- Plants receive excessive water in the final weeks
Split skins expose cloves to disease entry and dramatically reduce storage life. Harvest Glamour as soon as it reaches maturity rather than waiting for additional size gain—those few extra days often cost you storage quality.
Harvesting Method Choose a dry period with at least 3-4 days of fine weather forecast. Avoid harvesting if rain is expected, as wet conditions during and after harvest promote fungal issues, particularly problematic for Glamour given its already moderate storage life.
Stop all watering 7-10 days before planned harvest. Unlike varieties that tolerate complete water cutoff 2-3 weeks ahead, Glamour's sensitivity to water stress means you should maintain light moisture until the final week, then stop completely to allow some in-ground drying.
Harvest morning procedure:
- Wait until dew has dried (mid-morning is ideal)
- Loosen soil around bulbs using a garden fork, working 10-15cm away from plants to avoid piercing the medium-thick skins
- Gently lever soil upward, breaking the root zone
- Grasp stems close to the bulb and lift carefully, handle Glamour gently as the cured skins are somewhat fragile and break easily
- Shake off loose soil without banging bulbs together
- Lay bulbs on a tarp or in harvest crates in shade
- Transport immediately to the curing area
Handle with particular care, Glamour's beautiful purple skins are more fragile than some varieties and will crack or flake with rough treatment. Any skin damage shortens the already moderate 4-5 month storage life.
Curing Process Proper curing is essential for maximising Glamour's 4-5 month storage potential:
Setup: Hang bulbs in small bunches of 4-6 plants or lay them in single layers on wire racks. Never cure in direct contact with solid surfaces—complete air circulation is critical. The hollow scapes (where present) tend to fall out of bulbs as they dry, so bunching stem-to-stem works well for keeping everything together.
Location: Choose a well-ventilated area protected from rain and direct sunlight:
- Covered verandas with good airflow
- Open sheds with cross-ventilation
- Garages with windows/doors open during the day
- Purpose-built drying racks under 50% shade cloth
In humid regions, prioritise maximum airflow over complete weather protection if necessary. Glamour tolerates humidity during growth but needs excellent air circulation during curing.
Duration: Cure Glamour for 3-4 weeks minimum. The medium-thick skins require adequate drying time to toughen and seal properly. Curing is complete when:
- Outer skins are papery dry with that characteristic rustle
- Stems have shrivelled to 20-30% of fresh diameter
- Roots are completely dried and brittle
- The neck feels firm and dry when gently squeezed
- The vibrant purple-red harvest colour has mellowed to pale mauve with strong purple stripes and blotches
During curing: Check bulbs every 2-3 days, immediately removing any showing mould, softening, or rot. The fragile skins can trap moisture against cloves if damaged, creating disease entry points. In humid conditions, consider using fans to enhance air movement around curing bulbs.
Cleaning & Preparing for Storage Once fully cured:
- Trim roots to 5-10mm from the bulb base
- Cut stems 2-3cm above the bulb, the hollow scapes often separate easily, almost falling away during cleaning
- Very gently brush off loose soil or damaged outer wrapper layers
- Handle carefully, the smooth to coarse textured skins, while providing good bulb coverage, crack and flake easily
Don't over-clean Glamour. The cured skins, though somewhat fragile, protect the cloves, removing too many layers shortens storage life. Only remove the outermost layer if dirty or damaged.
Sorting for Storage: Separate bulbs into categories:
- Premium storage: Perfectly formed bulbs with intact, unsplit skins
- Immediate use: Bulbs with split wrappers, minor damage, or any skin cracking (use within 4-6 weeks)
- Seed stock: The largest, most perfect bulbs for next season's planting
Be realistic about storage expectations, bulbs with split skins or skin damage won't store the full 4-5 months regardless of storage conditions. Use these first while storing premium bulbs for later use.
Storage Conditions Glamour stores 4-5 months under optimal conditions, moderate storage life compared to long-storing porcelain or artichoke varieties, but respectable for a turban type:
Temperature: 10-15°C is ideal. Avoid storage areas exceeding 18°C, which accelerates sprouting and reduces storage to 3-4 months. Cool pantries, cellars, or temperature-controlled rooms work well.
Humidity: 60-70% relative humidity prevents both clove shriveling (too dry) and mould development (too wet). Avoid kitchens with cooking humidity or damp storage areas.
Light: Store in complete darkness. Light exposure triggers sprouting and can affect the beautiful purple colour.
Air Circulation: Critical for Glamour given its fragile skins. Use mesh bags, wooden crates with wide spacing, or hanging braids (if stems were left long). Never use plastic bags or airtight containers. The smooth to coarse textured skins can trap moisture if air doesn't circulate freely.
Storage Methods:
- Mesh bags: Hang from pantry hooks
- Wooden crates: Stack with spacing for airflow
- Wire baskets: Excellent air circulation from all sides
- Braided strings: Traditional method for longer-stemmed bulbs
Maintenance During Storage: Check stored bulbs every 2-3 weeks (more frequently than longer-storing varieties):
- Remove any bulbs showing softening, sprouting (green shoots emerging), or mould immediately
- Gently squeeze bulbs to verify firmness, soft spots indicate internal breakdown
- Watch for the characteristic purple colour fading significantly, which can indicate aging
- Use bulbs showing early sprouting immediately, don't wait
By late March/April (4-5 months post-harvest), most Glamour bulbs will either be used or showing signs of sprouting. This is normal for turban varieties and why they're classified as "short to medium" storage types.
Saving Seed for Next Season Select the largest, most perfectly formed bulbs immediately after curing:
- Medium to large size (5-7cm or larger)
- Intact, unsplit skins
- Beautiful purple colouration with strong striping
- No signs of disease or damage
- Well-formed flattened round shape
Store seed bulbs separately in optimal conditions. As April approaches and stored bulbs begin showing sprouting signs, your seed stock should also be monitored, plant cloves in April even if showing very early sprout development (tiny green tips), as this indicates vigour. Separate seed bulbs into cloves only 24-48 hours before planting.
Glamour's proven performance in challenging conditions makes it excellent for saving your own seed year after year, gradually selecting for even better performance in your specific location.
Shipping Restrictions
Western Australia Customers: We can ship most seed line items, except Quarantine WA restricted seed lines to WA. To help us ship your order as quickly and efficiently as possible, please do not include any seed items prohibited in WA; they are listed with the label 'NOT to WA'. Due to quarantine restrictions in WA, there is a 10kg seeds limit per variety. WA orders require additional handling time. Please remain within an approved limit when ordering seeds. We review every WA order before dispatch and remove (or reduce) excess seed quantity from your order to comply with WA biosecurity regulations. Please check further information here
Tasmania Customers: We can ship seeds to Tasmania. Please do not include seed line items labeled 'NOT to TAS'. Please note that the maximum allowable limit per permitted seed line item is 1kg per order.
You may also like
Recently viewed
I will review this purchase again after I harvest my garlic. I bought on a cost per number of heads. I must admit I would not have purchased if I realised that I was paying $120 a kilogram for seed garlic. I was disappointed with the size of the heads received and worked out the cost per kg. I have also bought garlic from another supplier (a different variety) which has very large cloves and was markedly cheaper per kg. It will be interesting to compare the finished products.