
How to Grow Tayberries in Australia
Plant bare-root tayberry canes in winter, 2 m apart and about 10 cm deep, beside a trellis in sun and rich, free-draining soil. Keep the soil moist through flowering and fruiting, and feed potash rather than nitrogen. Fruit comes from the second summer, on canes grown the season before. After picking, cut fruited canes to the ground and tie in the new ones.
| Sun | Full sun; afternoon shade in hot districts |
|---|---|
| Water | Steady moisture, most at flowering and fruiting |
| Soil | Humus-rich, free-draining, pH 6.3 to 6.8 |
| Feed | Medium; potash from flowering, light nitrogen |
| Spacing | 2 m apart |
| Depth | Shallow, about 10 cm |
| Germination | Not from seed: plant dormant bare-root canes |
| Harvest | Second summer after planting |
| Container | Not suited to pots |
| Frost | Frost hardy when dormant; flowers open late |
| Support | Post and wire trellis about 1.8 m |
| Use | Fresh, jam, pies, desserts and freezing |
Tayberry (Rubus hybrid) is a cross between a blackberry and a red raspberry, bred in Scotland and named after the River Tay. A member of the rose family, Rosaceae, it is grown for large, conical, deep red to purple berries so soft they rarely reach the shops. The fruit forms on canes that grew the summer before, and a common mistake is pruning those canes off.
Three mistakes that matter
- Cutting out next summer's canes. Tayberries fruit only on canes that grew the previous season, so a winter haircut that takes new and old together removes the whole crop. Cut out only canes that have fruited, as Pruning and Training shows.
- Letting canes sprawl. Canes left loose tangle into a prickly mass, root where their tips touch the soil and stay damp, which invites disease. Build the trellis before planting and tie canes to the wires as they grow.
- Dry soil at flowering and fruiting. Without steady moisture from spring onwards, berries stay small and lack flavour. Mulch with straw and water deeply right through flowering and picking.
When to plant
Plant bare-root canes in winter, while they are dormant and leafless. One planting crops for many years, so there is nothing to plant in succession. Tayberries crop best where winters turn properly cool, and in mild-winter districts the crop can be lighter.
| Zone | Example cities | Plant | Harvest | Notes |
|---|---|---|---|---|
| Tropical | Darwin, Katherine NT; Cairns, Townsville QLD; Broome WA | Not recommended | Not recommended | No cool winter for the canes to rest, and wet-season heat and humidity rot fruit and roots. |
| Subtropical | Brisbane, Sunshine Coast, Bundaberg QLD; Coffs Harbour, Lismore NSW | Jun-Jul | Nov-Jan | Plant dormant canes in the coolest weeks; expect lighter picking after mild winters, and give afternoon shade. |
| Arid and semi-arid | Alice Springs NT; Mildura VIC; Broken Hill, Dubbo NSW; Kalgoorlie WA | Jun-Aug | Dec-Jan | Plant while canes are leafless; from October, water daily and shelter canes from hot wind and afternoon sun. |
| Temperate | Sydney, Newcastle, Wollongong NSW; Melbourne, Geelong VIC | Jun-Aug | Dec-Feb | Plant before buds break in spring; Melbourne and the Dandenong Ranges suit berries well, and Sydney needs afternoon shade. |
| Mediterranean | Perth, Bunbury WA; Adelaide and the SA coast | Jun-Aug | Dec-Feb | Plant dormant canes in the winter rains. The Adelaide Hills suit well; mulch deeply and water steadily all summer. |
| Cool and alpine | Hobart, Launceston TAS; Canberra ACT; Ballarat VIC; Orange NSW; Stanthorpe QLD | Jun-Aug | Jan-Feb | Cool winters suit tayberries best; the dormant canes shrug off frost, and flowers open after most frosts. |
Plant on any winter day the soil is not waterlogged. Frost is no reason to wait: the dormant cane is frost hardy, and the flowers open late enough to miss most frosts.
Site, soil and setup
| Get the site right | What to do |
|---|---|
| Sun | Full sun in cool districts; in hot districts, morning sun with shade from the afternoon sun, which scorches leaves and fruit |
| Shelter | Out of hot, drying winds from the north and west |
| Soil | Rich in humus and free-draining; avoid ground that lies wet in winter, or build a mound or raised bed |
| pH | 6.3 to 6.8; below that, dig in dolomite lime at 100 to 200 g per square metre, 4 weeks ahead; above it, elemental sulphur at 25 to 50 g per square metre, 3 months ahead. See soil pH |
| Bed preparation | A 5 cm layer of compost and 5 to 10 cm of well-rotted cow or horse manure, dug in 4 to 6 weeks before planting |
| Mulch | Straw, hay, lucerne or sugarcane mulch, kept clear of the canes; not woodchip |
| Trellis | Posts standing 1.8 m above ground and set 60 cm deep, with galvanised wires at 90, 120, 150 and 180 cm; two wires, at waist and shoulder height, also work |
Choose a bed where tomato, potato, eggplant, capsicum and strawberries have not grown for several years. Verticillium wilt (Verticillium dahliae), a soil fungus these crops can leave behind, can also attack cane berries and persists in the soil.
Planting Canes
Tayberries start from a dormant bare-root cane planted straight into the ground, because plants raised from seed do not come true. Due to quarantine restrictions and our shipping policy, we cannot send tayberry canes to Western Australia or Tasmania.
Bare-root preparation
A bare-root cane arrives as a short, leafless stem with a bundle of roots. It is dormant, not dead, but exposed roots dry out quickly, and dry roots can kill it. Plant it the day it arrives if you can, and soak the roots in a bucket of water while you dig. If planting must wait, keep the roots in damp packing for up to a week. Or heel them in: bury the roots in a shallow trench of moist soil.
Planting on the trellis
- Dig a hole wider than it is deep and mix in some compost.
- Spread the roots and set the plant shallow, about 10 cm deep, with the top roots about 5 cm under the surface.
- Space plants 2 m apart along the trellis, with rows 1 to 2 m apart.
- Backfill, firm gently and water in with seaweed solution at 30 mL per 9 L.
- Cut the cane back to a healthy bud 20 to 25 cm above the soil.
The first summer brings new canes but little or no fruit. Tie them to the wires as they grow, because they carry the first crop in the second summer.
Care by growth stage
Steady water at flowering and fruiting, potash rather than nitrogen, and open, tied canes decide the crop. Months suit most southern gardens and run a little earlier in warm districts.
| Stage | Water | Feed | Watch for |
|---|---|---|---|
| Settling in, Jun to Aug | Water in well, then keep the soil just moist; winter rain often does the rest | Seaweed solution at 30 mL per 9 L, fortnightly; no fertiliser yet | Roots drying out; water lying around the base |
| Budburst and new canes, Sep to Oct | Water deeply as growth starts and top up the mulch | Pelletised chicken manure at 100 g per square metre, once in early spring, or an all-purpose controlled release granular (NPK around 14-5-10) at the label rate; keep nitrogen light | Two-spotted mite (Tetranychus urticae) in dry spells; suckers away from the row |
| Flowering, Oct to Nov | Keep the soil evenly moist; water the soil, not the flowers | Sulphate of potash at 30 to 50 g per square metre once, at first flowers, then liquid potash at the label rate, fortnightly; or a fruiting and flowering soluble (NPK around 15-4-26) at the label rate, fortnightly | Grey mould (Botrytis cinerea) on flowers after wet, cool days |
| Fruiting and picking, Dec to Feb | Keep watering steady right through picking; dry soil gives small, dull berries | Fish and seaweed blend at 25 mL per 9 L, fortnightly, or a fruiting and flowering soluble (NPK around 15-4-26) at the label rate, fortnightly | Birds, possums, Queensland fruit fly (Bactrocera tryoni) and sunburnt fruit |
| After harvest to winter, Mar to Aug | Water less as leaves fall, but do not let new canes wilt in autumn heat | A 5 cm layer of compost as winter mulch; on sandy soil, sulphate of potash at 30 g per square metre in winter; or a controlled release granular (NPK around 14-5-10) at the label rate in late winter | Fruited canes left in; downy mildew (Peronospora sparsa) on leaves in wet weather |
Net the trellis once berries start to colour, using white, wildlife-safe netting with mesh too small to push a finger through. Stretch it taut over a frame so it does not rest on the fruit. In hot districts, drape shade cloth over the row on very hot days.
Pruning and Training
Each plant carries two sets of canes at once: young canes that fruit the following summer, and older canes fruiting in the current one. Training keeps the two apart, so pruning follows one rule: whatever has fruited comes out.
- After the last picking, cut every cane that has fruited down to about 5 cm above the ground.
- Keep the four to eight strongest new canes per plant, and cut weak or crowded ones out at the base.
- Through spring and summer, tie new canes loosely in a bundle along the top wire, away from the fruiting canes.
- Once the old canes are out, spread the bundled canes along the lower wires and tie them in to fruit next summer.
- Keep cane tips off the soil and pull out suckers that come up away from the row.
- Bag and bin old or diseased prunings rather than leaving them under the plants.
| Training method | How it works | Suits |
|---|---|---|
| Fan | Fruiting canes tied out in an arch on both sides; new canes tied upright in the centre, then to the top wire | High yields for more work; best for less vigorous plants |
| Weave | Fruiting canes woven through the wires on both sides; new canes upright and tied to the top wire | The highest yields and the most work |
| Rope | Canes bunched together and wound along the wires | The least work, but canes shade each other and crop less |
| One way, other way | Fruiting canes tied along the wires in one direction, new canes in the other | Keeps old and new canes apart for pruning |
Wear leather gloves and long sleeves for every job on the trellis, because tayberry canes carry prickles.
Companion planting
Keep the trellis row free of crowding plants so air moves through the canes, and grow low flowering plants at its ends and edges.
Grows well with
- Alyssum, whose small, nectar-rich flowers draw hoverflies and other beneficial insects.
- Thyme, a low, drought-hardy edging whose flowers draw bees.
Keep apart
- Tomato, eggplant, capsicum, potato and strawberry, for the wilt reason in Site, soil and setup.
- Wild blackberry, an unmanaged host of Queensland fruit fly and of blackberry pests such as redberry mite (Acalitus essigi).
- Raspberry in the same row, whose upright canes compete for space and need different pruning.
Harvesting Fruit
Pick berries when they have turned deep reddish-purple, feel slightly soft and come away with their core inside.
- Check plants every 3 to 4 days once the berries colour.
- Pick only fully ripe fruit, since berries do not ripen further once picked.
- Hold each berry lightly and pull it free.
- Lay fruit in a shallow bowl or punnet, two or three layers deep, so it does not crush.
- Remove mouldy or damaged berries as you go.
Store tayberries unwashed in a shallow container in the fridge, use them within one to two days, and wash them just before eating.
For longer keeping, freeze them or cook them into jam, which suits their sharp-sweet flavour. Eat the rest fresh, or in pies and desserts.
Common problems
No fruit in the first summer. A first-year plant grows only the canes that fruit the following summer; see Planting Canes.
No fruit after winter pruning. The new canes went out with the old ones; see Three mistakes.
Scorched leaves and shrivelled berries. Hot afternoon sun burns foliage and fruit in hot districts; shade the row as Site, soil and setup and Care by growth stage describe.
Canes wilting and dying back in wet ground. Phytophthora root rot (Phytophthora spp.), a water mould of poorly drained, heavy soil, rots the fine roots. Replant healthy canes on a mound of fresh soil. Read more
Ripe fruit gone before you pick it. Birds and possums take ripe berries; net as Care by growth stage describes. Read more
Pests and diseases
Dry heat favours two-spotted mite, and wet weather among crowded canes favours the leaf, cane and fruit diseases below.
Two-spotted mite (Tetranychus urticae). Mites about 0.6 mm long feed under the leaves, leaving yellow-white speckles that bronze the foliage, often with fine webbing. They build up in hot, dry summers and after sprays that kill their predators, so keep plants watered and avoid broad sprays. Read more
Grey mould (Botrytis cinerea). Flowers turn brown and berries rot under fuzzy grey growth after several wet, cool days. Pick off infected fruit, keep canes tied open and go easy on spring nitrogen, which makes the soft growth the fungus readily infects.
Downy mildew (Peronospora sparsa). Angular yellow blotches on top of the leaves turn red to purple, with pink to tan patches beneath, and green berries redden early and shrivel. It favours wet weather at 18 to 22°C, so thin canes early. Read more
Cane spot (Elsinoe veneta). Small purplish spots on young canes grow grey centres with purple rims, and leaf spots can drop out, leaving holes. Plant healthy canes and keep the row narrow, open and weeded.
Queensland fruit fly (Bactrocera tryoni). Blackberry, boysenberry, loganberry and raspberry are all hosts, and females lay eggs inside ripening fruit. Start control 6 to 8 weeks before picking, with fine insect netting, traps and prompt picking. Bird netting is too coarse to stop the fly. After flowering, drape 2 mm insect mesh over both sides of the trellis, secure it to the ground and keep it off the berries. Read more
Light brown apple moth (Epiphyas postvittana). Its small caterpillars, yellow when young and later green with a brown head, roll leaves together with silk and chew leaves, flowers and fruit. Pull out dock and capeweed nearby, where the moth survives winter, and spare the lacewings and spiders that prey on it.
Prevention first
- Start with healthy, disease-free canes.
- Clear fallen and rotting fruit, then freeze it, or seal it in a bag in the sun for at least 14 days, before binning.
- Check leaf undersides, new canes and ripening fruit every week.
- If a spray is needed, note that pyrethrum harms bees. Spray late in the day, away from open flowers, and follow the label and its withholding period.
Tips
- Short of space, fix the wires to outriggers on a sunny boundary fence instead of building a freestanding trellis.
- For a second plant, tip layer a young cane on purpose in mid to late spring. Bury its tip, then cut it free once it roots.
- Grow a tayberry beside a loganberry to stretch the picking season, since tayberries ripen first.
Questions
When do you plant tayberries in Australia?
Plant bare-root tayberry canes in winter, usually June to August, while they are dormant. Plant them the day they arrive if you can, and soak the roots in water while you dig. Tayberries do best where winters turn properly cool, and they are not suited to the tropics.
How long does a tayberry take to fruit?
Expect the first real crop in the second summer after planting. Tayberries fruit on canes that grew the season before, so the first summer is spent growing those canes. After that, a healthy plant can crop every summer for many years.
Do tayberries need a trellis?
Yes. The canes grow long and prickly, so tie them to a post and wire trellis about 1.8 m high. Training keeps fruit off the ground, lets air through the canes and shows which canes to cut after picking. It also stops cane tips touching the soil and taking root.
How do you prune a tayberry?
After the last picking, cut every cane that has fruited down to about 5 cm above the ground. Keep the four to eight strongest new canes, and spread them along the wires to fruit next summer. Never cut out the new canes, or you lose the next crop.
What is the difference between a tayberry and a loganberry?
Both are crosses between a blackberry and a red raspberry. Tayberries were bred later in Scotland from different parents, and their fruit is usually larger, sweeter and more aromatic.
Why are tayberries rarely sold in shops?
Ripe tayberries are very soft, so they bruise easily and do not pack or travel well. That is why growing your own is the usual way to taste them. Pick them fully ripe and eat, freeze or cook them within a day or two.
More edible produce guides
All edible produce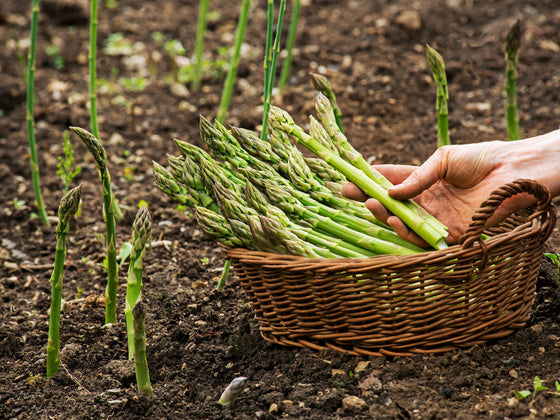
Asparagus
How to grow asparagus from seed in Australia: raising seedlings, planting crowns, a bed of its own, when to start picking spears and cutting back the fern.
| Position | Full sun |
|---|---|
| Depth | Seed 1 to 2 cm |
| Spacing | 30 to 40 cm |
| First pick | Third spring from sowing |
Blackberry
Grow thornless blackberries in Australia: each state's weed rules, planting bare-root canes in winter, trellis training, pruning, feeding and picking the fruit.
| Position | Full sun, afternoon shade inland |
|---|---|
| Depth | Old soil mark, or 3 to 5 cm deeper |
| Spacing | 150 to 180 cm apart |
| First pick | Second summer after planting |
Boysenberry
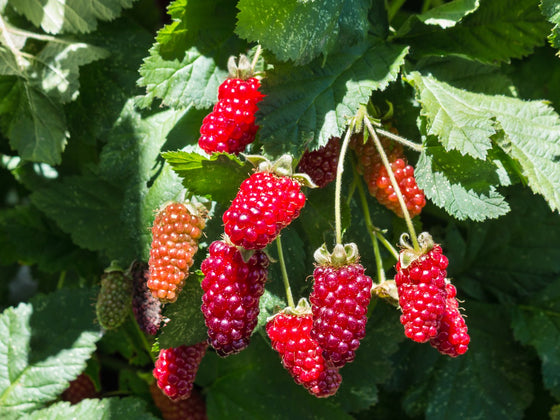
Grow boysenberries in Australia from bare-root canes: winter planting by climate zone, building a wire trellis, feeding, pruning fruited canes and picking.
| Position | Sun; afternoon shade where hot |
|---|---|
| Depth | Stem base level with soil |
| Spacing | 1.5 to 2 m apart |
| First pick | Early summer, from year two |
Elephant garlic
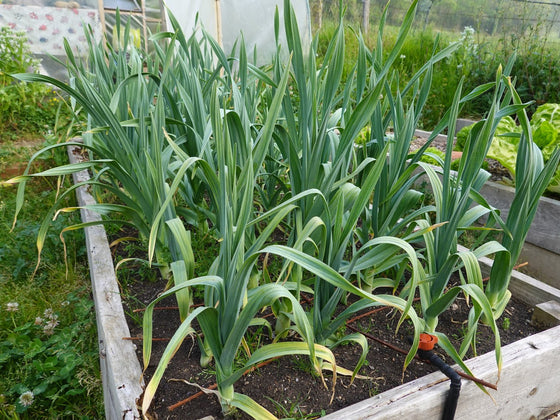
Also sold as Russian garlic. Plant the large cloves in April or May, keep the bed weeded and watered, and use the finger test to judge when the bulbs are ready.
| Position | Full sun, 6 hours or more |
|---|---|
| Depth | 5 cm of soil over tip |
| Spacing | 20 to 30 cm |
| First pick | 6 to 8 months |