
How to Grow Dutch Iris in Australia
Dutch iris grows from bulbs planted in autumn, from March in cool districts to June in warm ones, and flowers from about August to November. Plant each bulb pointed end up, 8 to 10 cm deep and 8 to 15 cm apart, in full sun and free-draining soil. Keep the soil moist while it is in leaf, let the leaves wither, and keep the bulbs dry over summer.
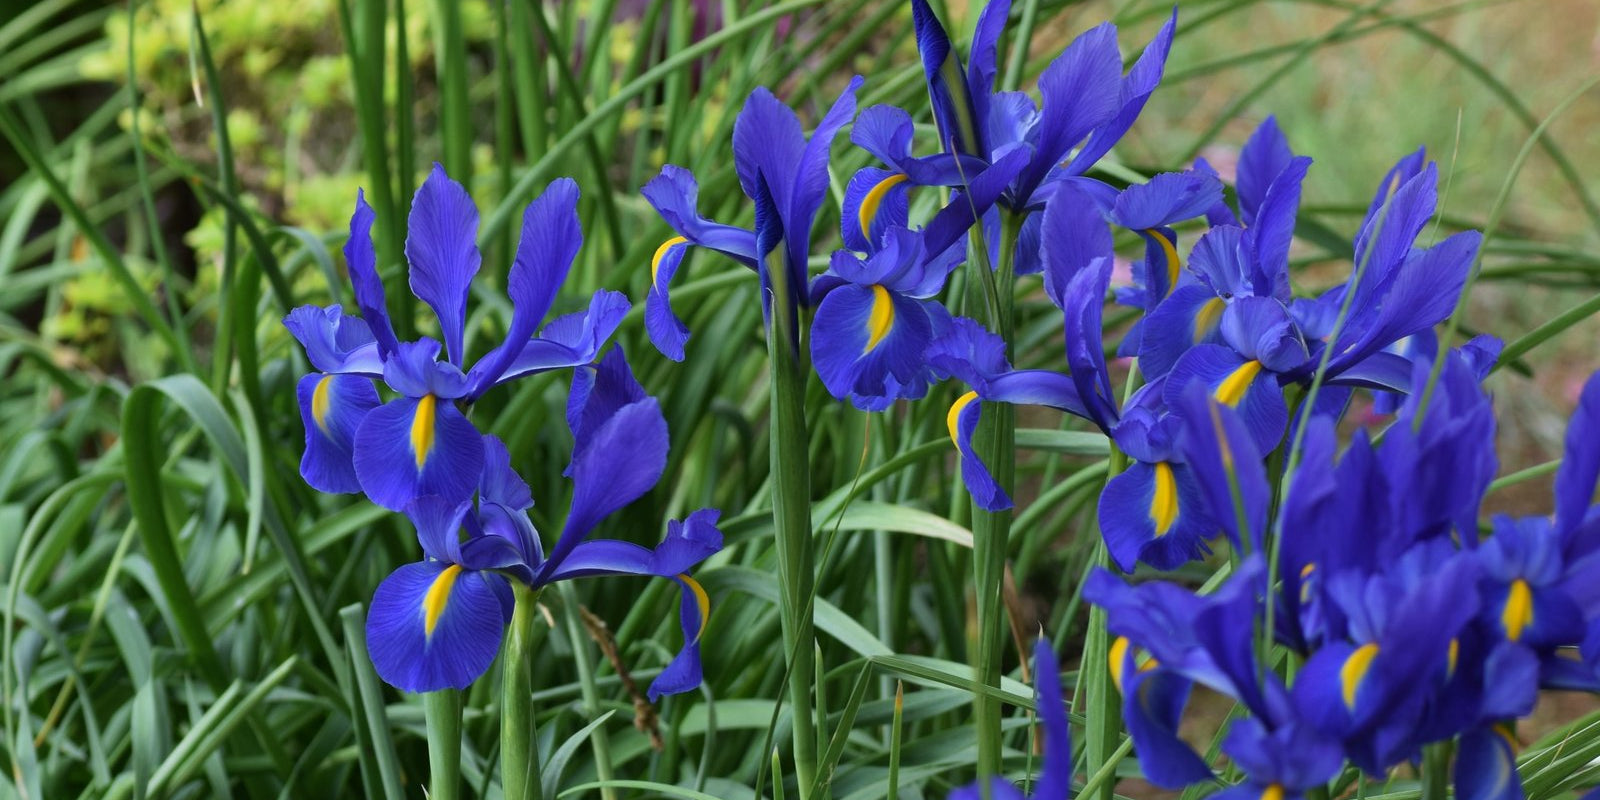
| Sun | Full sun |
|---|---|
| Water | Moist while in leaf, dry over summer |
| Soil | Free-draining, slightly acid to alkaline |
| Feed | Light: bone meal, seaweed solution, sulphate of potash |
| Spacing | 8 to 15 cm |
| Depth | 8 to 10 cm, tip up |
| Germination | Leaves usually show within a few weeks |
| Harvest | August to November, by zone and planting date |
| Container | Yes, in a pot at least 20 cm deep |
| Frost | Moderately frost tolerant |
| Use | Spring beds and long-stemmed cut flowers |
Dutch iris (Iris × hollandica, family Iridaceae) is a spring-flowering bulb grown for blue, white and yellow flowers on long stems for the vase. From Spain, Portugal and North African parents, it grows through cool, wet winters and rests dry in summer, a rhythm much of southern Australia shares. The mistake most gardeners make is keeping the bulbs wet, in heavy soil or a summer-watered bed, where they rot.
Three mistakes that matter
- Planting in soil that stays wet. Dutch iris bulbs rot quickly in waterlogged ground and often never come up. Plant in free-draining soil, a raised bed or a pot, and work compost or coarse sand into heavy clay first.
- Watering through the summer rest. After flowering the bulbs go dormant and need a warm, dry rest. Regular summer water in an irrigated bed rots them, so stop watering once the leaves yellow, and lift the bulbs where summers are wet.
- Cutting the leaves too soon. The leaves feed the bulb for next spring, so cutting, tying or mowing them while green means fewer flowers. Leave them until they yellow and wither, which can take six to eight weeks.
When to plant
Plant in autumn, once the summer heat has gone out of the soil, and ideally just before a spell of autumn rain. Cool districts plant first, from March, and warm districts last, into June, with Anzac Day near the middle of the window across the south. For a longer run of cut stems, plant a few bulbs every 2 to 3 weeks through the window rather than all at once.
| Zone | Example cities | Plant | Flowering | Notes |
|---|---|---|---|---|
| Tropical | Darwin NT; Cairns, Townsville QLD; Broome WA | Not recommended | Not recommended | Winters are too warm for reliable flowers. Chilled bulbs in pots, grown as dry-season annuals, are a gamble. |
| Subtropical | Brisbane, Sunshine Coast, Bundaberg QLD; Coffs Harbour, Lismore NSW | May-Jun | Aug-Oct | Chill bulbs 6 to 8 weeks first. Give afternoon shade; on the warm coast, treat them as annuals. |
| Arid and semi-arid | Alice Springs NT; Broken Hill, Dubbo NSW; Mildura VIC | Apr-May | Sep-Oct | Cold winter nights suit it. Water through winter and spring, then let the bed dry out for summer. |
| Temperate | Sydney, Newcastle, Wollongong NSW; Melbourne, Geelong VIC | Mar-Jun | Sep-Nov | Reliable here. Plant once the soil cools, Melbourne first; Sydney plantings around Anzac Day suit well. |
| Mediterranean | Perth, Bunbury WA; Adelaide and the SA coast | Apr-Jun | Sep-Oct | Wet winters and dry summers match its natural rhythm. Water only in dry winter spells. |
| Cool and alpine | Hobart, Launceston TAS; Canberra ACT; Ballarat VIC; Orange NSW | Mar-May | Oct-Nov | Plant early so roots settle before the coldest soil. Leaves stand frost; mulch lightly over winter. |
Where winters are warm, the bulbs need chilling in the fridge before planting, as set out under Planting Bulbs.
Site, soil and setup
Pick the sunniest, best-drained spot you have, because sun and drainage decide most of the result.
| Need | What to do |
|---|---|
| Sun | Full sun, at least six hours a day. In warm districts, afternoon shade protects the flowers from heat. |
| Soil | Free-draining loam or sandy loam. Dig compost or coarse sand into heavy clay. |
| pH | About 6.0 to 7.0 is ideal, but alkaline soil suits too. Below 6.0, dig in dolomite lime at 100 to 200 g per square metre 4 weeks before planting. |
| Drainage | Never waterlogged. On clay or in wet districts, plant in a raised bed or mound. |
| Bed preparation | Loosen the soil to at least 15 cm and dig in a 5 cm layer of compost. Do not use fresh chicken manure, which can burn bulbs. |
Where bulbs have rotted, rest that bed from bulbous iris for a few years and plant somewhere fresh. If you are unsure of your soil, a soil test kit settles the pH question before you buy lime; see soil pH explained.
Container growing
Dutch iris grows well in pots, and a pot makes the dry summer rest easy to give. Use a squat, wide pot with drainage holes, at least 20 cm deep and 25 cm across, about 10 L. Fill it with premium potting mix. Set the bulbs so close they almost touch, about 10 cm deep. The shorter varieties, such as 'Blue Magic' and the four-bulb Florist Mixed pack at 45 to 60 cm, suit a pot well.
- Watering. Water once at planting, then again when shoots appear. Pots dry out faster than beds, so check them weekly through winter and spring.
- Feeding. Give seaweed solution at 30 mL per 9 L every fortnight from the first shoots until the flowers fade.
- Position. Full sun.
- Summer. Once the leaves have withered, move the pot under cover or out of the rain so the bulbs stay dry.
- Repotting. Repot into fresh mix each autumn, because old potting mix breaks down and the bulbs can rot in it.
Planting Bulbs
Start Dutch iris from dormant bulbs planted straight into the bed or pot where they will flower.
Choosing bulbs
Buy firm, plump bulbs and discard any that are soft, mouldy or marked with black, inky patches. They are all grown the same way. The falls are the three outer petals that curve down, and the standards are the three upright inner ones.
| Variety | Flowers | Height |
|---|---|---|
| 'Angel Wings' | White, with a soft gold-yellow blaze on the falls | 50 to 60 cm |
| 'Casablanca' | Pure white, with only a faint creamy centre | 50 to 60 cm |
| 'Texas Gold' | Golden yellow, with an orange-gold blaze on the falls | 50 to 60 cm |
| 'Blue Magic' | Deep indigo-purple, with a golden-yellow blaze | 45 to 60 cm |
| 'Discovery' | Violet-blue falls with a golden-orange blaze, lilac-blue standards | 60 to 90 cm |
| Florist Mixed | A mix of blue, purple, white and yellow, with bronze in some packs | 45 to 90 cm |
| Blue (25-bulb gift bag) | Deep violet-blue, with golden markings | 45 to 60 cm |
Bearded iris, grown from a rhizome (a thick, creeping underground stem), and peacock iris (Moraea aristata) are different plants with different needs.
Chilling bulbs for warm districts
Dutch iris needs a cool winter to flower well. In the subtropics, put the bulbs in a paper bag in the fridge crisper for 6 to 8 weeks, then plant them out. Keep apples out of the crisper meanwhile, because the gas they give off can spoil the bulbs. Do not chill them for more than 12 weeks, because bulbs chilled too long are stressed.
Planting out
- Wear gloves. Every part of the plant is harmful if eaten, the bulbs most of all, and the sap can irritate skin. Keep bulbs away from children and pets.
- Set each bulb pointed end up, 8 to 10 cm deep. Going as deep as 15 cm can help bulbs flower again in later years.
- Space bulbs 8 to 15 cm apart, closer for a dense block of cut flowers.
- Water in well once, then hold off until the first leaves show, unless the soil dries right out.
- Leaves usually show within a few weeks, and flowers follow in spring.
- Spread a light mulch over the bed to keep the soil cool and moist.
Care by growth stage
Steady moisture while the plant is in leaf, then a dry rest once it dies down, decides how well it flowers next year. In well-prepared soil, Dutch iris needs only light feeding.
| Stage | Water | Feed | Watch for |
|---|---|---|---|
| Planting to first leaves, weeks 0 to 4 | Water in once, then only if the soil dries right out | Bone meal at 100 g per square metre, raked in at planting | Bulbs rotting in wet soil; snails on the first shoots |
| Leafy growth, from week 4 until buds show | Water weekly in dry spells, keeping the soil moist but never soggy | Seaweed solution at 30 mL per 9 L every fortnight | Aphids on new growth; black blotches of ink disease |
| Buds and flowers, about August to November | Keep the soil evenly moist through flowering and cutting | Sulphate of potash at 30 to 50 g per square metre as buds show, watered in | Flecked leaves and streaked flowers from mosaic viruses; snails on buds |
| Leaves yellowing, 6 to 8 weeks after flowering | Reduce watering as the leaves yellow, then stop | Fish and seaweed blend at 25 mL per 9 L every fortnight while leaves are still green | The urge to cut green leaves; remove them only once brown |
| Summer rest | None; keep the bed dry | None | Weeds over the bulbs; summer storms in wet districts |
Week ranges run from planting. In poor soil, a light dose of all-purpose controlled release granular (NPK around 14-5-10) scratched in at planting can replace the bone meal.
Clumps can stay in the ground for several years. If flowering falls off as a clump crowds, lift it in late summer once the leaves have withered. Separate the offsets (small bulbs that form beside the parent) and replant them in autumn.
Companion planting
Good partners share the iris's dry summer rest, or cover the bare soil without needing summer water.
Grows well with
- Daffodils and other spring bulbs, which share its autumn planting and dry summer, and whose patches the upright iris stems break up.
- Pansies or violas planted over the bulbs, which give colour before the iris flowers.
- Baboon flower (Babiana) planted above iris in a pot, which flowers after it for a longer show.
Keep apart
- Vegetable beds, where a bulb could be dug up and eaten by mistake.
- Gladiolus, which shares bean yellow mosaic and cucumber mosaic viruses that aphids carry between bulbs.
Harvesting Blooms
Cut stems for the vase when the bud shows a line of colour above its green sheath, before the petals open.
- Cut early in the morning, while stems are cool and full of water.
- Cut the stem at an angle, low down, but leave the leaves on the plant.
- Stand stems in deep, cool water for several hours before arranging them.
- Change the vase water every day or two.
- Snap off faded flowers on garden plants, so the bulb puts nothing into seed.
Cut stems keep longer in a cool room. Store lifted bulbs in a dry place until autumn planting. White 'Casablanca' and 'Angel Wings' lighten a mixed spring bunch, and 'Texas Gold' sits well with tulips and ranunculus.
Common problems
Leaves but no flowers. Usual causes are too little sun, a winter too warm for the bulbs, crowded clumps, or leaves cut too soon (see Three mistakes that matter). Chill bulbs in warm districts and divide crowded clumps.
No shoots in spring. The bulbs have most likely rotted in wet soil; if a bulb you dig up is soft, replant fresh bulbs in a drier, raised spot. Read more
Buds that dry out unopened. Heat, too little light or dry soil while the stems lengthen makes buds wither before they open. Grow the plants in full sun and keep the soil moist until the flowers open.
Yellowing leaves after flowering. This is normal: the bulb is drawing food back from the leaves for next year's flowers.
Pests and diseases
Dutch iris has few serious problems, and most start with wet soil or aphids.
Aphids (Aphididae). Small green, black or brown sap-suckers cluster on new growth and buds, peaking in spring, and they spread iris viruses. Hose them off, or spray horticultural oil or soapy water, but not in hot weather. Read more
Common garden snail (Cornu aspersum) and slugs. They chew new shoots and buds, feeding at night and in wet weather. Hunt for them after rain, checking under leaves and around rocks where they shelter by day. Read more
Ink disease (Bipolaris iridis). Leaves develop black blotches, then yellow and wither, and bulbs carry inky black patches; it is most common on Dutch and other bulbous irises. Bin affected plants and rest the soil from bulbous iris for a few years.
Mosaic viruses (bean yellow mosaic virus and others). Leaves show light green or yellow flecks, and flowers develop irregular streaks of colour, called flower breaking. Aphids spread them and there is no cure, so remove weak, affected plants. Read more
Prevention first
- Plant only firm, clean bulbs, checked as under Choosing bulbs.
- Give the bed the drainage and dry summer set out in Three mistakes that matter.
- Check shoots and buds weekly from winter for aphids and snails, and act early.
- Pull weeds that shelter aphids, and clear away dead leaves once they wither.
Tips
- Plant in groups of at least 15 to 20 bulbs, because single stems look lost in a bed.
- Mark where the bulbs are before the leaves die down, so a spade does not find them in summer.
- Pair white 'Casablanca' or 'Angel Wings' with deep blue 'Blue Magic' for a blue and white bed.
Due to quarantine restrictions and our shipping policy, we cannot send Dutch iris bulbs to Western Australia or Tasmania.
Questions
When do you plant Dutch iris bulbs in Australia?
Plant in autumn, once the soil has cooled after summer. Cool districts plant from March, and warm districts as late as June. In the subtropics, chill the bulbs in the fridge for 6 to 8 weeks first. In the tropics they rarely flower well.
How deep do you plant Dutch iris bulbs?
Plant each bulb pointed end up, 8 to 10 cm deep and 8 to 15 cm apart. Going as deep as 15 cm can help bulbs flower again in later years. Water in once, then wait until the leaves show before watering again.
Do Dutch iris come back every year?
Yes, where the soil drains well and summers are dry, the bulbs flower again each spring and slowly multiply. Leave the leaves until they wither. On the warm, humid coast they often fade after a year, so many gardeners treat them as annuals there.
Do I need to chill Dutch iris bulbs before planting?
Only where winters are warm, such as the subtropics. Put the bulbs in a paper bag in the fridge crisper for 6 to 8 weeks, and no longer than 12 weeks. Then plant them out. In cool, temperate and Mediterranean districts, winter does the job.
Are Dutch iris poisonous to dogs and cats?
Yes. Every part of the plant is harmful if eaten, the bulbs most of all, by people, dogs and cats. Wear gloves when planting, store bulbs out of reach of children and pets, and seek medical or veterinary advice if any is eaten.
What is the difference between Dutch iris and bearded iris?
Dutch iris grows from a bulb, flowers in spring on slender stems, and dies down to rest dry over summer. Bearded iris grows from a rhizome, a thick creeping stem near the surface, and is lifted and divided every few years.
Grow it
Tap Add beside a size to put it in your cart. You stay on this page.
- Dutch Iris Angel Wings (Pack of 5 Bulbs)From $13.19
- Dutch Iris Casablanca (Pack of 5 Bulbs)From $13.19
- Dutch Iris Florist Mixed (Pack of 15 Bulbs)Out of stock
- Dutch Iris Texas Gold (Pack of 5 Bulbs)From $13.19


More bulbs and tubers to sow in October
All bulbs and tubersCalla Lily
Grow coloured calla lilies from tubers: planting depth and timing for six zones, water and feeding, lifting and storing, pests, toxicity and the arum lily weed.
| Position | Full sun, hot-afternoon shade |
|---|---|
| Depth | 10 cm, rough side up |
| Spacing | 20 to 30 cm |
| First pick | 7 to 12 weeks from planting |
Canna Lily
Grow dwarf canna lilies from rhizomes: planting depth and timing for six zones, feeding for flowers, cutting back, dividing, pests, and the weed lists by state.
| Position | Full sun |
|---|---|
| Depth | 5 to 10 cm, eyes up |
| Spacing | 50 to 70 cm |
| First pick | 6 to 8 weeks from shooting |
Gladioli
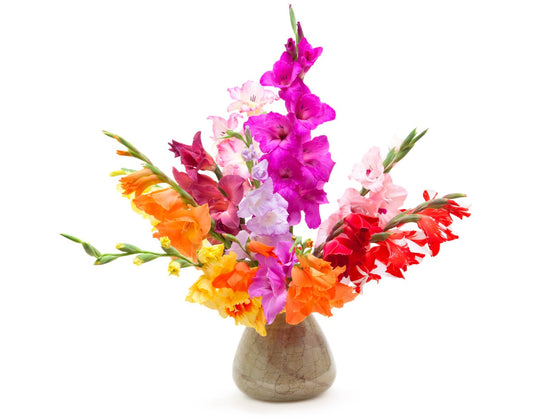
Grow gladioli from corms in Australia: planting depth and timing for six zones, staking, feeding, cutting, lifting and storing, pests and the wild weed species.
| Position | Full sun, sheltered from wind |
|---|---|
| Depth | 10 to 15 cm, flat side down |
| Spacing | 10 to 15 cm |
| First pick | 13 to 17 weeks from planting |
Hippeastrum
Grow hippeastrums in any Australian zone: when to plant bulbs, why the neck sits above the soil, pots, feeding, frost, pests, toxicity and state weed status.
| Position | Full sun or dappled shade |
|---|---|
| Depth | Top third above soil |
| Spacing | 10 to 30 cm |
| First pick | 5 to 8 weeks |