
How to Grow Peacock Irises in Australia
Plant peacock iris corms in autumn, 3 cm deep and 10 cm apart, in full sun and free-draining soil. Water deeply while the leaf is green, then keep the corms completely dry over summer. White flowers with blue eyes follow from late winter into spring. Cut spent stems before seed forms, never dump corms, and keep the plant away from grazing stock.
| Sun | Full sun or light shade |
|---|---|
| Water | Moist in winter growth; dry summer rest |
| Soil | Free-draining sand, loam or clay; acid to neutral |
| Feed | Bone meal at planting; potash from first flowers |
| Spacing | 10 cm apart |
| Depth | 3 cm deep |
| Germination | Grown from corms; leaf grows through winter |
| Harvest | Jul to Oct, by zone |
| Container | Yes; a deep pot 30 cm wide |
| Frost | Light frost only; shelter in cold areas |
| Use | Beds, rockeries, pots and small vases |
Peacock iris (Moraea aristata) is a low-growing member of the iris family Iridaceae that grows from a corm. It is grown for white, iris-like flowers with an iridescent blue eye at the base of each outer petal. Botanists once called it Iris pavonia, and the peacock moraea (Moraea villosa) is a close cousin. It grows through winter and rests over summer, which suits the dry-summer south, and summer water rotting the corms is the commonest failure.
Three mistakes that matter
- Watering the bed in summer. From late spring to autumn the corms sit dormant, and soil that stays damp through that rest lets fungal rot in. Choose a spot that drains fast, turn the hose off when the leaf yellows, and leave the bed dry until autumn.
- Letting the soil dry out while the leaf is green. Leaf and flowers are built on winter and spring moisture, and a dry spell then can cost a season of flowers. Water deeply whenever the top few centimetres of soil dry out, from planting until the leaf yellows.
- Letting it seed or dumping spare corms. Peacock iris has gone wild in south-western Victoria, and its cape tulip cousins are declared weeds that poison livestock. Snip off each flower stem when its last bloom fades, so no seed ripens, and put spare corms in the rubbish bin.
When to plant
Autumn is planting time: wait until the summer heat has broken and nights are turning cooler. In most southern gardens Anzac Day falls inside the window. The leaf grows through winter, and the flowers open from late winter into spring, once a year.
| Zone | Example cities | Plant | Flowering | Notes |
|---|---|---|---|---|
| Tropical | Darwin NT; Cairns, Townsville QLD; Broome WA | Not recommended | Not recommended | The corms need a cool growing season and a dry rest; the wet season gives neither. |
| Subtropical | Brisbane, Gold Coast, Bundaberg QLD; Coffs Harbour, Lismore NSW | Apr-May | Aug-Sep | Best in pots carried under cover for summer, since humid summer rain rots dormant corms. |
| Arid and semi-arid | Alice Springs NT; Broken Hill, Dubbo NSW; Mildura VIC; Kalgoorlie WA | Apr-May | Aug-Oct | Long dry summers suit the dormant corms. Water generously in winter and cover leaves on frosty nights. |
| Temperate | Sydney, Newcastle, Wollongong NSW; Melbourne, Geelong VIC | Mar-May | Aug-Oct | Anzac Day is a good planting cue. Sydney's summer downpours make a raised bed or pot safer. |
| Mediterranean | Perth, Bunbury WA; Adelaide and the SA coast | Mar-May | Jul-Sep | Wet winters and dry summers mirror its Cape home. Plant well away from paddocks and bushland. |
| Cool and alpine | Hobart, Launceston TAS; Canberra ACT; Ballarat VIC; Orange NSW | Mar-Apr | Sep-Oct | Hard frost scorches the leaf: choose a warm, sheltered bed, or move pots somewhere bright on frosty nights. |
Corms that arrive during a late heatwave can wait for cooler nights, stored as under Harvesting Blooms.
Site, soil and setup
| Need | What to do |
|---|---|
| Light | Full sun, or morning sun with light afternoon shade. |
| Soil | Sandy, loamy or clay soil that drains freely, with well-rotted compost worked through it. |
| pH | Acid to neutral suits it. |
| Bed preparation | Fork a 5 cm layer of compost into the top of the bed, then scatter bone meal at 100 g per square metre as you plant. Fresh chook manure can burn corms, so leave it out. |
| Drainage | If puddles sit for hours after rain, or the soil is heavy clay, build a raised bed or use a deep pot instead. |
After a loss to rot, start again with sound corms somewhere drier, not in the bed that failed.
Weed status, state by state
Peacock iris is critically endangered in the wild near Cape Town, yet it has naturalised in south-western Victoria. Its relatives the cape tulips, one-leaf (Moraea flaccida) and two-leaf (Moraea miniata), are declared weeds of pasture across southern Australia. No state or territory list names peacock iris itself, but the Tasmanian listing of cape tulips is broad enough to check first.
| State or territory | What the weed lists say |
|---|---|
| Western Australia | Peacock iris is permitted (section 11) on the Western Australian Organism List. One-leaf and two-leaf cape tulips are declared pests (section 22(2)), and six other Moraea species are declared pests, prohibited (section 12). |
| South Australia | Peacock iris is not on the List of Declared Plants. Both cape tulips are declared under the Landscape South Australia Act, and selling or moving them is prohibited. |
| Victoria | Peacock iris is not a declared noxious weed, but the state's advisory list of environmental weeds rates it high risk. Both cape tulips are regionally prohibited or regionally controlled, depending on the catchment. |
| New South Wales | Peacock iris is not listed in NSW WeedWise. Both cape tulips are, under the general biosecurity duty, and the North West region asks that nobody buy, sell or grow them. |
| Queensland | No Moraea species is a prohibited or restricted invasive plant. |
| Tasmania | Cape tulips are declared weeds, and their import, sale and distribution are prohibited. The state's list of declared pests names them under the old genus Homeria, but the declared weeds index heads them Moraea species and an earlier state management plan counted every Moraea. Ask Biosecurity Tasmania before planting peacock iris. |
| Northern Territory | No Moraea species is on the list of weeds in the NT. |
| Australian Capital Territory | No Moraea species is among the declared pest plants. |
The same habits apply in every state: deadhead before seed ripens and bin spare corms, as under Three mistakes. Old potting mix from a peacock iris pot can hide cormlets, so bag it too rather than spreading it near bushland or a paddock.
Container growing
Outside the tropics, peacock iris grows well in a pot. Where summer brings storms, a pot is the surest way to grow it, because the resting corms can be carried out of the rain. Choose a deep pot with drainage holes, 30 cm or more across and holding about 15 L. Use premium potting mix lightened with a few handfuls of coarse sand, and plant corms 3 cm deep, 10 cm apart.
The store sells one form, the white flower with a blue eye, which reaches about 20 to 35 cm tall. Corms tend to sink to the bottom of a pot, so tip it out and replant each year once the leaf withers.
- Watering. Soak the mix after planting. While the leaf is green, water again each time the surface feels dry, then let the pot dry out completely once the leaf turns yellow.
- Feeding. Give seaweed solution at 30 mL per 9 L once a fortnight through leaf growth. From first bloom until the leaf fades, switch to liquid potash at its label rate, also fortnightly.
- Position. A sunny spot from autumn to spring, then a dry shelter, such as a carport or under the eaves, for summer.
Planting Corms
What arrives in the pack is a corm (a short, solid storage stem replaced each year), planted while dormant.
Planting a bed
- Ready the soil with compost and bone meal, as the table under Site, soil and setup sets out.
- Sort the corms and set aside any that are shrivelled or mouldy.
- Push each corm in tip upward so about 3 cm of soil covers it, which is around double its width.
- Space corms about 10 cm apart, so cormlets have room to fill out a clump.
- Water in well to settle the soil, then keep it lightly moist as the leaf appears.
- Push in a label or stake, since the patch is bare all summer and easy to dig into by mistake.
Lifting and dividing
Where summers are reliably dry, the corms can stay put for years. Cormlets (small new corms) form at the tips of short underground runners and slowly build a clump. Once flowering thins out from crowding, dig the clump after the leaf has died back and split it. Brisbane-style humid summers, or a bed that gets summer irrigation, call for digging the corms annually as the leaf browns.
Twist the cormlets free of the parent corm and throw away anything soft. Replant them in autumn, or pot cormlets up singly to grow on.
Care by growth stage
Flowering rests on three things: generous water through winter, plenty of sun, and a summer with no water at all. Feed lightly.
| Stage | Water | Feed | Watch for |
|---|---|---|---|
| Planted, roots forming, autumn | Soak once, then keep just moist | Bone meal at 100 g per square metre raked in at planting | Puddles over the planting after storms |
| Leaf growing, late autumn to winter | Soak the bed each time the top few centimetres feel dry | Seaweed solution at 30 mL per 9 L every fortnight | Snails at night; leaf tips scorched by hard frost |
| Flowering, late winter to spring | Do not let the soil dry while buds open and stems are being cut | Liquid potash at the label rate every fortnight from the first flowers | Dry spells; spent stems to cut before they seed |
| After flowering, leaf yellowing, late spring | Taper off as yellowing starts, then cease | Liquid potash at the label rate every fortnight until the leaf yellows | Stippled, pale leaves from spider mites as the weather warms |
| Dormant, summer | Nothing at all until autumn | None | Irrigation overspray or storm water reaching the corms; lift them in wet-summer zones |
If growth stalls in poor soil, a light dose of all-purpose controlled release granular (NPK around 14-5-10) scratched into the surface in autumn can help. Established clumps also welcome a 5 cm mulch of compost spread over them before the leaf emerges.
Companion planting
The best neighbours want the same sun, sharp drainage and dry summer, and low ones hide the leaf as it dies down.
Grows well with
- Lavender, a sun lover that copes with dry summers once its roots are established.
- Rosemary, an evergreen backdrop that fills the gap left by the dormant corms.
- Catmint, whose soft grey growth screens the dying leaf in late spring.
- Dianthus, a short edging plant that shares the taste for gritty, fast-draining soil.
Keep apart
- Dahlias and canna lilies, thirsty summer growers whose watering would soak the dormant corms.
- Any watered lawn or drip-irrigated bed, where summer moisture reaches the corms.
- Boundaries next to bushland, a creek line or grazing land, which escaped cormlets and seed can reach.
Harvesting Blooms
For a vase, choose a stem whose top bud is swollen and showing white, still closed.
- Pick soon after sunrise, before the day warms and the stems lose water.
- Snip with clean, sharp secateurs and drop each stem into a jug of water as you go.
- Take the flower stem only, and leave the single leaf on the plant until it has withered completely.
In the garden each flower lasts about three days, but a clump keeps opening new ones for three to four weeks. Lifted or newly bought corms keep best completely dry, in a paper bag in an airy cupboard, until autumn planting.
Common problems
Healthy leaf, no blooms. Shade, crowding, a leaf cut while green or dry soil in growth can leave corms too weak to flower. Divide crowded clumps as under Planting Corms.
Pots that flower less each year. The corms have sunk, so tip the pot out and replant as under Container growing.
Seedlings or new plants beyond the bed. Seed or wandering cormlets are the cause. Lift each stray, corm and all, while its leaf still shows, and send it out in the rubbish.
Pests and diseases
Peacock iris is not especially prone to pests, and most trouble comes from summer moisture or hot, dry spring weather.
Spider mites (Tetranychus species). Spider mites often attack the undersides of peacock iris leaves as temperatures rise in late spring, leaving them stippled and pale. Spray horticultural oil on the undersides at its label rate, in the cool of the day. Read more
Corm rot (fungal). Corms kept damp over summer often rot and turn soft, and the leaf may fail to appear in autumn. Discard soft corms and start again as under Site, soil and setup.
Garden snail (Cornu aspersum). Common in gardens all over Australia, snails may graze the tender leaf in autumn and winter. Hand-pick them on damp evenings. Read more
Prevention first
- Plant only firm corms, and throw out any soft ones found at lifting.
- Check leaf undersides for fine webbing once spring turns hot.
- Spare the small black mite-eating ladybirds by avoiding broad-spectrum sprays.
- Rake away dead leaves and old stems once the clump goes dormant.
Tips
- Sink an old colander into the bed and plant the corms inside it, so lifting takes one scoop.
- Plant a few corms beside a path or in a pot by the door, where the small flowers can be seen up close.
- In wet-summer zones, split the corms between the bed and a pot kept under cover, as insurance against a stormy summer.
Due to quarantine restrictions and our shipping policy, we cannot send peacock iris corms to Western Australia or Tasmania.
Questions
When do you plant peacock iris corms in Australia?
Autumn, after the summer heat breaks. Perth, Adelaide, Sydney and Melbourne gardeners can plant from March to May, and Brisbane and inland gardens in April or May. Cool districts such as Canberra plant in March or April, before hard frosts. Flowers open from late winter into spring.
Is peacock iris a weed in Australia?
No state or territory list names it. It has naturalised in south-western Victoria, where an advisory list rates it a high-risk environmental weed. Tasmania declares its relatives the cape tulips as Moraea species, so ask Biosecurity Tasmania before planting there. Cut spent stems before seed forms, and never dump corms.
How deep do you plant peacock iris corms?
About 3 cm of soil over the top, pointed tip upward, which is roughly double the corm's width. Allow around 10 cm between corms, choose free-draining soil, and give a good soak after planting.
Can you grow peacock iris in pots?
Yes, and pots are the safest option where summers are wet. Choose a deep pot 30 cm or more across with drainage holes. Water and sun it while the leaf is green, shelter it from rain over summer, and repot yearly, because the corms creep downward.
Is peacock iris poisonous to pets and livestock?
Its close relatives the cape tulips are poisonous to people and grazing animals, even dried in hay, and peacock iris may carry a similar risk. Keep it out of paddocks, store corms away from children and pets, and wear gloves when handling them, because the sap can irritate skin.
Why is my peacock iris not flowering?
Usually the spot is too shady, the clump is crowded, the leaf was cut while green, or the soil dried out during winter growth. Corms in pots also sink and flower less. Move corms into full sun, divide crowded clumps and water deeply while the leaf is green.
More bulbs and tubers to sow in October
All bulbs and tubersCalla Lily
Grow coloured calla lilies from tubers: planting depth and timing for six zones, water and feeding, lifting and storing, pests, toxicity and the arum lily weed.
| Position | Full sun, hot-afternoon shade |
|---|---|
| Depth | 10 cm, rough side up |
| Spacing | 20 to 30 cm |
| First pick | 7 to 12 weeks from planting |
Canna Lily
Grow dwarf canna lilies from rhizomes: planting depth and timing for six zones, feeding for flowers, cutting back, dividing, pests, and the weed lists by state.
| Position | Full sun |
|---|---|
| Depth | 5 to 10 cm, eyes up |
| Spacing | 50 to 70 cm |
| First pick | 6 to 8 weeks from shooting |
Crinum
Grow crinum lilies in Australia: plant bulbs with the neck above the soil, where to site them, care through flowering, lily caterpillar control and toxicity.
| Position | Full sun to part shade |
|---|---|
| Depth | Neck just above soil |
| Spacing | 40 to 60 cm |
| First pick | Nov to Apr flowers |
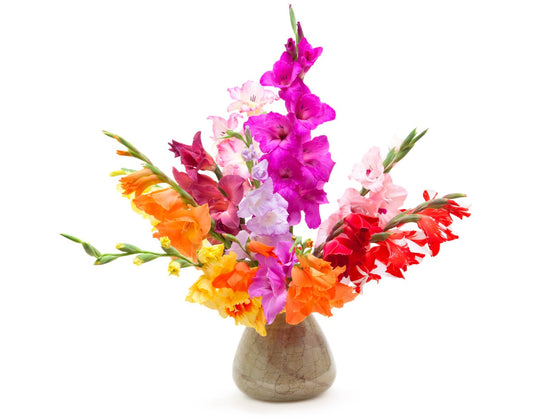
Gladioli
Grow gladioli from corms in Australia: planting depth and timing for six zones, staking, feeding, cutting, lifting and storing, pests and the wild weed species.
| Position | Full sun, sheltered from wind |
|---|---|
| Depth | 10 to 15 cm, flat side down |
| Spacing | 10 to 15 cm |
| First pick | 13 to 17 weeks from planting |