
How to Grow Tussock Bellflowers in Australia
Tussock bellflower is a low, hardy perennial with upturned cup flowers. Press the dust-fine seed onto moist mix without covering it, and keep trays at 18 to 24°C; seedlings appear in 2 to 4 weeks. Plant out 30 cm apart in free-draining soil, in sun with afternoon shade where summers are hot. First flowers usually open 23 to 26 weeks after sowing.
| Sun | Sun, afternoon shade in heat |
|---|---|
| Water | Evenly moist, never soggy |
| Soil | Free-draining, fertile, pH about 6 to 8 |
| Feed | Light: compost, spring manure, seaweed solution |
| Spacing | 30 cm apart |
| Depth | Surface sow, press in |
| Germination | 10 to 28 days at 18 to 24°C |
| Harvest | Flowers 23 to 26 weeks |
| Container | Yes; pot at least 20 cm wide |
| Frost | Hardy; clumps survive hard frost |
| Use | Edging, rockeries, pots, baskets and small posies |
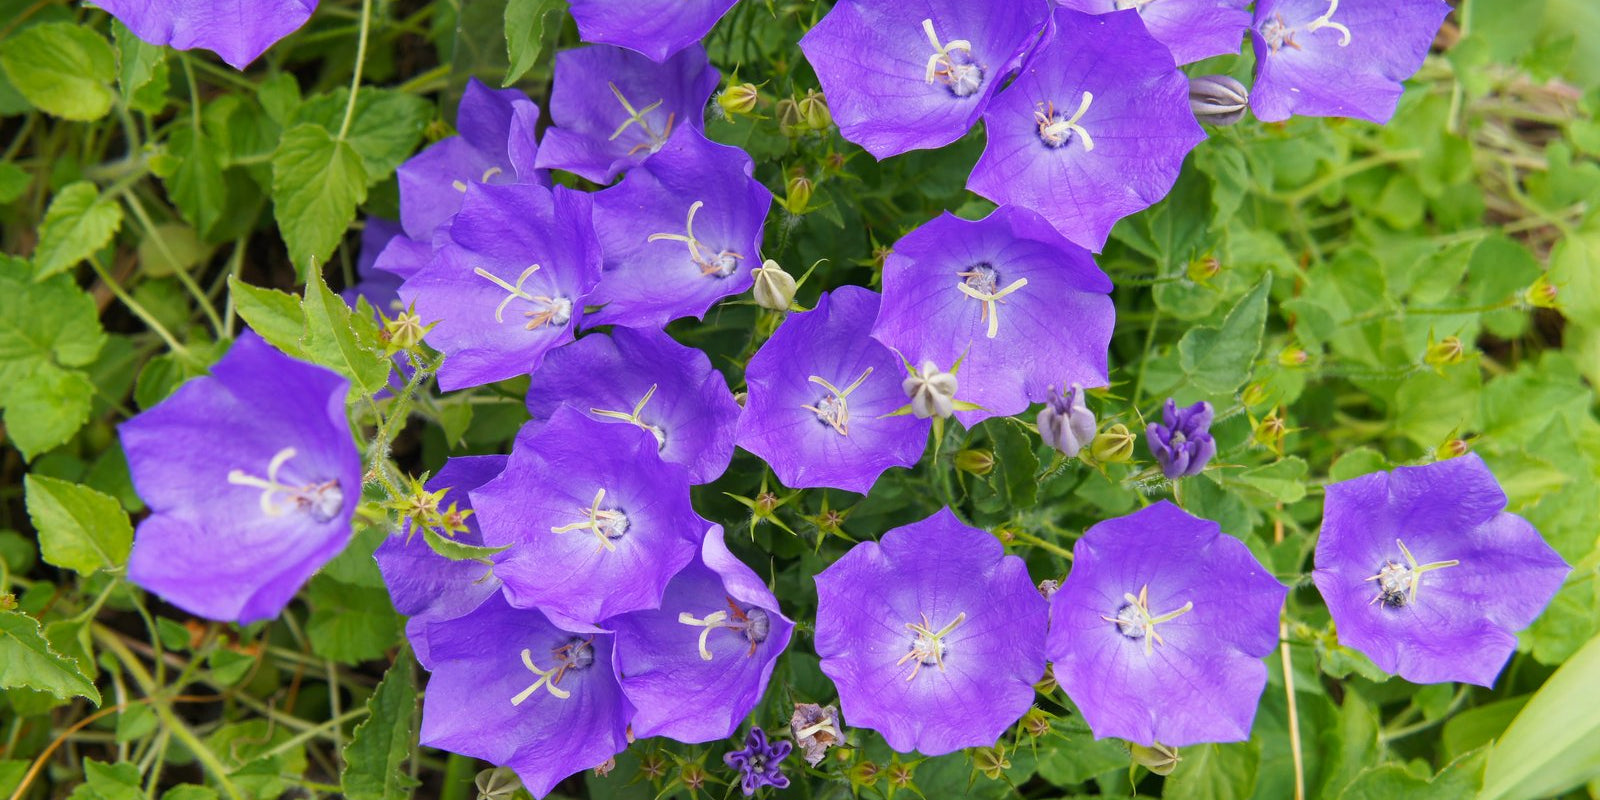
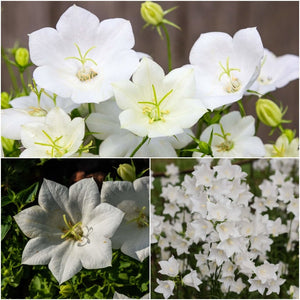
Tussock bellflower (Campanula carpatica), or Carpathian bellflower, is a low perennial in the bellflower family (Campanulaceae), grown for its upturned cup flowers. Its blue, white or rose pink clumps suit path edges, rockeries and pots, and it is unrelated to native tussock grasses (Poa species). The mistake most gardeners make is burying the dust-fine seed, which needs light to germinate.
Three mistakes that matter
- Burying the seed. The seed is as fine as dust and needs light to germinate, so seed covered with mix often fails to appear. Press it onto the surface and add no more than a dusting of vermiculite to hold moisture.
- Planting in wet, heavy soil. The clump will not tolerate soil that stays wet, and its roots and crown rot in waterlogged ground or an overwatered pot. Plant in free-draining soil, a raised bed or a rockery pocket, and water when the surface dries.
- Giving it the full afternoon heat. Hot sun and dry soil stress the clump, and humid nights that stay above about 21°C shorten its life. In hot inland and northern gardens, plant where afternoon shade falls and mulch to keep the roots cool.
When to plant
Seed germinates at 18 to 24°C, so the warmth of the tray decides when to start. Sow in autumn while the days stay warm, or in spring once a tray on a bright sill or a seedling heat mat holds 18°C. One sowing is enough, because each plant forms a clump that lasts for years. Sow Canterbury bells in autumn, from February in the south to July in the north, for flowers the following spring and summer.
| Zone | Example cities | Sow | Flowering | Notes |
|---|---|---|---|---|
| Tropical | Darwin NT; Cairns, Townsville QLD; Broome WA | Apr-May | Sep-Nov | A trial only: sow as the dry season starts; warm, humid wet-season nights usually end the plants. |
| Subtropical | Brisbane, Sunshine Coast, Bundaberg QLD; Coffs Harbour NSW | Mar-May | Sep-Dec | Autumn sowings flower in spring. Humid summer nights often shorten its life, so plant in afternoon shade. |
| Arid and semi-arid | Alice Springs NT; Broken Hill NSW; Mildura VIC; Kalgoorlie WA | Mar-Apr and Sep | Sep-Dec | Plant in afternoon shade, mulch well and water steadily; summer heat and dry soil stress the clump. |
| Temperate | Sydney, Newcastle, Wollongong NSW; Melbourne, Geelong VIC | Mar-Apr and Sep-Nov | Oct-Mar | Sow in autumn for spring flowers, or in spring once trays hold 18°C. Shade it from Sydney afternoons. |
| Mediterranean | Perth, Bunbury WA; Adelaide and the SA coast | Mar-May and Sep-Oct | Oct-Feb | Autumn sowings flower before the dry heat; give spring sowings afternoon shade, mulch and steady summer water. |
| Cool and alpine | Hobart, Launceston TAS; Canberra ACT; Ballarat VIC; Orange NSW | Feb-Mar and Sep-Nov | Nov-Mar | Raise spring trays under cover and plant out after the last frost; cool summers give the longest flowering. |
At the cold edge of a window, start trays indoors and plant out after the last frost. At the hot edge, keep trays in bright shade so the surface-sown seed never dries out.
Site, soil and setup
| Need | What to do |
|---|---|
| Sun | Full sun in cool and mild gardens. In hot summer climates, part shade, especially in the afternoon. |
| Soil | Fertile and moist but well drained. Loam, sandy and chalky soils all suit it. On water-repellent arid soils, a wetting agent at the label rate helps water soak in. |
| pH | About 6 to 8. If a test reads below 6, spread garden lime at 100 to 200 g per square metre 4 weeks before planting. |
| Drainage | Essential (see Three mistakes that matter). On heavy clay, plant into a raised bed or a rockery pocket. |
| Bed preparation | Dig in a 5 cm layer of compost before planting, and add a handful of worm castings to each planting hole. |
| Mulch | A light summer mulch keeps the root zone cool. Keep it clear of the crown. |
The clump stays in one spot for years, so it needs no yearly rotation; replant divisions into freshly composted soil. For ground that stays soggy after rain, read about waterlogged garden soil.
Container growing
All three tussock bellflower colours, blue, white and single rose pink, stay low and suit pots, troughs and hanging baskets. Give one plant a pot at least 20 cm wide and deep, about 5 L. Canterbury bells is taller and needs a pot at least 30 cm wide. Fill pots with premium potting mix, with about a third perlite added for drainage.
- Watering. Water when the top of the mix feels dry, and empty any saucer after rain. See watering pots through summer.
- Feeding. Give fish and seaweed blend at 25 mL per 9 L every fortnight from spring until flowering ends.
- Position. Morning sun and afternoon shade in hot gardens, full sun where summers are cool.
- Snails. A band of copper tape around the pot keeps snails and slugs off the leaves.
Sowing Seeds
Start tussock bellflower in trays, where the fine seed stays lit, moist and out of reach of snails.
Starting under cover
- Fill a clean tray or punnet with fresh seed raising mix, firm it and water it before sowing.
- Mix the seed with a pinch of dry sand, scatter it thinly and press it onto the surface, as in sowing tiny seeds.
- Leave it uncovered, or add only a dusting of vermiculite, then mist it or water the tray from below.
- Keep the tray at the temperature under When to plant, in bright light out of direct sun, under a clear cover.
- Seedlings appear in 10 to 28 days, most within 2 to 3 weeks. Lift the cover once they do, to let air in.
- Prick out seedlings into 8 cm pots once they can be handled, and grow them on somewhere cool and bright.
| Variety | Plant | Life | Height | Depth | Spacing | Emerges |
|---|---|---|---|---|---|---|
| Tussock Bellflower Blue | Tussock bellflower, blue upturned cups | Hardy perennial | 15 to 40 cm by site | Surface, pressed in | 30 cm | 2 to 3 weeks |
| Tussock Bellflower White | Tussock bellflower, white upturned cups | Hardy perennial | 15 to 40 cm by site | Surface, pressed in | 30 cm | 2 to 3 weeks |
| Tussock Bellflower Single Rose Pink | Tussock bellflower, rose pink upturned cups | Hardy perennial | 15 to 40 cm by site | Surface, pressed in | 30 cm | 2 to 3 weeks |
| Canterbury Bells Cup and Saucer Mix | Canterbury bells (Campanula medium), purple, lavender and white bells, single or cup and saucer | Biennial | 60 to 80 cm | Surface, pressed in | 30 cm | 7 to 14 days |
Sowing direct
Seed can go straight into a fine, weed-free bed in mild weather after the last frost. The seedlings are tiny, hard to find among weeds and easy prey for snails, so trays are the safer start. Press the seed onto raked soil, keep the surface moist with a fine spray and thin seedlings to 30 cm apart.
Transplanting
Plant out once roots fill the 8 cm pot. Harden seedlings off first (a week or so of gradually longer spells outdoors that toughens soft growth), as in hardening off seedlings. Set each plant at its pot depth, 30 cm apart, and water it in with seaweed solution at 30 mL per 9 L.
Canterbury bells
Canterbury bells is a different species: a biennial that makes a leafy rosette in its first year and flowers in its second. Sow and transplant it the same way, and push in a stake at planting, because the flowering stems grow tall.
Care by growth stage
Even moisture, cool roots and light feeding decide how long a clump lives and flowers. It needs far less feed than annual bedding flowers.
| Stage | Water | Feed | Watch for |
|---|---|---|---|
| Seedlings in trays, weeks 1 to 8 | Keep the mix just moist; mist, or water from below | Nothing until the first true leaves, then seaweed solution at half strength, 15 mL per 9 L, every fortnight | Damping off; pale, stretched seedlings |
| Planting out, weeks 8 to 12 | Water deeply at planting, then whenever the top of the soil dries | Compost and worm castings at planting (see Site, soil and setup), then seaweed solution at 30 mL per 9 L every fortnight for a month | Snails and slugs at night |
| Growing on, weeks 12 to 23 | Keep the soil evenly moist, never soggy | Fish and seaweed blend at 25 mL per 9 L every fortnight | Aphids on shoot tips and buds |
| Flowering, from about week 23 | Keep watering steady through flowering, at soil level in the morning | Sulphate of potash at 30 g per square metre once as the first flowers open, watered in | Powdery mildew in warm, humid weather |
| Established clumps, from the second spring | Water in dry spells; mulch for summer | Pelletised chicken manure at 100 g per square metre each spring, with compost as mulch kept off the crown | A crowded, bare centre |
Weeks count from sowing. First flowers usually open 23 to 26 weeks after sowing, so autumn sowings flower the following spring. If growth stalls in poor soil, a light dose of all-purpose controlled release granular (NPK around 14-5-10) scratched in each spring can help.
Cutting Back
Regular deadheading keeps flowers coming for weeks, and a trim after the main flush tidies the clump and stops self-sown seedlings.
- Snip each faded flower off at the base of its stalk every few days while the clump is flowering.
- After the main flush, shear the flowered stems back to the leafy mound.
- If the leaves look tired in summer, cut the clump back to its basal growth; fresh leaves follow.
- Where winter cold kills the leaves, clear them away before growth resumes in spring.
- Divide the clump every 2 to 4 years, in early spring or late summer, as in dividing perennials.
- Pull out Canterbury bells once flowering ends, since the plant usually dies after its second summer.
Companion planting
Tussock bellflower belongs at the front of a border or rockery, beside plants that share its free-draining soil and leave it room.
Grows well with
- Aubretia, which likes the same rockery pockets and wall tops.
- Thyme, a low, sun-loving edging that does not smother the clumps.
- Violas, which suit the same cool, lightly shaded front-of-border spots.
- Vegetable beds, where the flowers draw bees and other pollinators.

Keep apart
- Sunflowers and other tall, dense plants, which shade and crowd the low clump.
- Mint and other fast spreaders, which overrun a slow-spreading clump.
- Lettuce and other soft seedlings, which draw snails and slugs to the same bed.
Harvesting Blooms
Pick tussock bellflower once the cups are fully open.
- Cut in the cool of the morning and stand stems in water straight away.
- Cut each stem at its base, so picking doubles as deadheading.
- Pick Canterbury bells when two or three of the lower bells on a stem are open.
- Carry and store Canterbury bells stems upright, because they bend when laid flat.
- Leave a few flowers on each clump if you want to save seed.

Keep cut flowers in a cool room out of direct sun, and top up the water each day. After flowering, seed capsules turn brown and dry; collect them then and store the seed in a paper envelope somewhere cool and dry. The three colours are one species and can cross, so seed from mixed plantings may not come true.
Use the thin-stemmed tussock bellflower in small table posies, and Canterbury bells as a long-stemmed cut flower.
Common problems
Seeds did not come up. Buried seed (see Three mistakes that matter), a tray that dried out or one kept below 18°C are the usual causes. Read more
Pale, stretched seedlings. Seedlings raised in poor light stretch and flop. Read more
Clump wilts and rots at the base. Root and crown rots take hold in wet, heavy soil, and a badly affected plant seldom recovers, so lift healthy pieces into better drainage. Read more
Flowering stops early. Spent flowers left on the plant, and hot, dry weather, end the flush sooner; deadhead as under Cutting Back.
Fewer flowers and a bare centre. The clump is crowded; divide it as under Cutting Back.
Canterbury bells made only leaves. This is normal in the first year, because the plant is a biennial and flowers in its second.
Pests and diseases
Snails do the most harm, from the seed tray onward, while aphids and mildew are usually minor.
Common garden snail (Cornu aspersum). This introduced snail, found in every state and territory, chews holes in soft leaves and flowers, and slugs do the same. Hunt them at night, sink shallow beer traps into the soil, or ring pots with copper tape. Read more
Foxglove aphid (Aulacorthum solani). This green aphid sucks sap from shoot tips and buds, leaving sticky honeydew. Hose it off, or spray horticultural oil or soapy water, but not in hot weather. Read more
Powdery mildew (Erysiphe species). White powdery patches spread over the leaves, most often in warm, humid weather. Pick off affected leaves and spray 1 part full-cream milk to 10 parts water. Read more
Damping off (Pythium species and Rhizoctonia solani). These soil-borne pathogens rot seedlings at soil level, so they collapse in the tray. Read more
Prevention first
- Sow in fresh seed raising mix in clean trays, and lift the cover once seedlings appear.
- Space plants 30 cm apart and water at soil level in the morning.
- Check shoot tips and leaf undersides each week in warm weather.
- Clear leaf litter and rubbish where snails and slugs hide by day.
Tips
- Tuck plants into gaps in a dry-stone wall or between pavers, where drainage is sharp and the stones keep the roots cool.
- Plant the blue, white and rose pink forms in a run along a path edge; they share one height and flowering season.
- In cold gardens, label each clump in autumn, because it can die back in winter and is easy to dig into by mistake.
- Label Canterbury bells rosettes in their first year so nobody weeds them out before they flower.
Questions
Does tussock bellflower come back every year?
Yes. Tussock bellflower is a hardy perennial that forms a slowly spreading clump and returns each spring. It lasts longest in cool and mild gardens. Where summer nights stay warm and humid, plants are often short-lived. Divide the clump every 2 to 4 years to keep it flowering well.
Why are my campanula seeds not germinating?
The most common cause is covering the seed. Tussock bellflower seed is dust-fine and needs light to germinate. Press it onto moist seed raising mix, add at most a dusting of vermiculite, and keep the tray at 18 to 24°C. Seedlings usually appear in 2 to 3 weeks.
Does tussock bellflower flower in its first year from seed?
Usually, if sown early. First flowers tend to open 23 to 26 weeks after sowing. An autumn sowing flowers the following spring, and a spring sowing can flower by late summer or wait until the next spring.
Is tussock bellflower the same as tussock grass?
No. Tussock bellflower is Campanula carpatica, a low flowering perennial from the mountains of eastern Europe. Tussock grasses, such as common tussock grass (Poa labillardierei), are native Australian grasses in a different plant family.
What is the difference between Canterbury bells and tussock bellflower?
Both are bellflowers, but they are different species. Canterbury bells (Campanula medium) is a biennial that grows 60 to 80 cm tall and flowers in its second year. Tussock bellflower is a low perennial clump with upturned cups, flowering in its first or second year.
How do I keep Carpathian bellflower flowering longer?
Snip off each faded flower at the base of its stalk every few days. After the main flush, shear the flowered stems back to the leafy mound. Keep the soil evenly moist and the roots cool with mulch, and give afternoon shade in hot gardens.
Grow it
More flowers to sow in September
All flowers
Ageratum
Grow ageratum from seed in Australia: surface sowing, months for six climate zones, spacing, pots, deadheading, weed and livestock cautions and pests to watch.
| Position | Full sun, 6 hours or more |
|---|---|
| Depth | Surface, 1 mm at most |
| Spacing | 30 cm; Red Flint 40 cm |
| First pick | 12 to 14 weeks from sowing |

Alyssum
Grow alyssum from seed in Australia: sowing months for six climate zones, surface sowing, spacing, pots, shearing for more flowers, and the pests to watch.
| Position | Full sun or part shade |
|---|---|
| Depth | Surface sow, press in |
| Spacing | 15 to 20 cm |
| First pick | 8 to 9 weeks from sowing |

Aster
Grow China asters in Australia: sowing months for six climate zones, spacing, pots, watering, Fusarium wilt and thrips, and cutting blooms for the vase.
| Position | Full sun, 6 hours minimum |
|---|---|
| Depth | 6 mm |
| Spacing | 30 to 40 cm |
| First pick | 13 to 16 weeks |

Aubretia
Growing aubretia as a hardy groundcover in Australian gardens: sowing, position, trimming after flowering, companion plants and common pests.
| Position | Full sun, 6 hours or more |
|---|---|
| Depth | On the surface, barely covered |
| Spacing | 25 to 30 cm |
| First pick | Spring, after a winter chill |