
How to Grow Chives in Australia
Chives are a perennial onion-family herb, and garlic chives are a flat-leaved relative grown the same way. Sow a pinch of seed about 5 mm deep in full sun to part shade and free-draining soil, spacing clumps 15 to 25 cm apart. Start cutting from 8 to 12 weeks, a section at a time. Pinch out flowers for more leaf and divide clumps every 3 years or so.

| Sun | Full sun to part shade |
|---|---|
| Water | Deep watering once or twice weekly when dry |
| Soil | Fertile, free-draining, pH 6.0 to 7.0 |
| Feed | Light; half-strength fish and seaweed blend after cutting |
| Spacing | Clumps 15 to 25 cm apart |
| Depth | 5 to 10 mm |
| Germination | 7 to 21 days in 10 to 30°C soil |
| Harvest | Light cuts from 8 to 12 weeks |
| Container | Yes, 30 cm pot, about 13 L |
| Frost | Hardy; dies back in cold winters |
| Use | Fresh leaves and edible flowers |
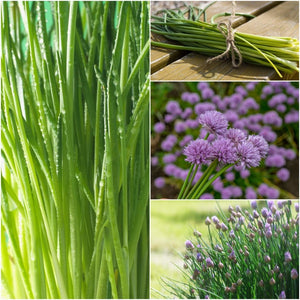
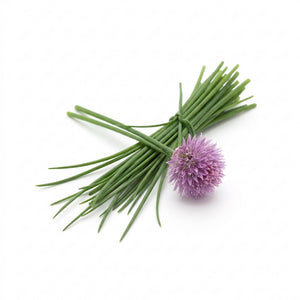
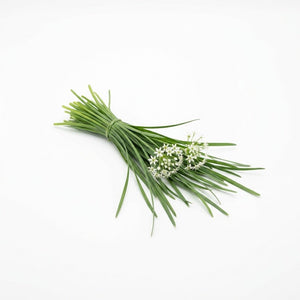
Chives (Allium schoenoprasum) are a small perennial herb in the onion family, Amaryllidaceae, grown for their hollow, mild onion leaves and edible mauve flowers. Garlic chives (Allium tuberosum) are a separate species with flat leaves, a garlic flavour and white flowers, grown much the same way. A clump sown once can be cut for years, in gardens from Cairns to Launceston. Many gardeners then leave a clump alone for years and wonder why its leaves turn thin and sparse.
Three mistakes that matter
- Letting every flower set seed. Seeding drains a clump's vigour, and garlic chives scatter seedlings right through the bed. Pinch out buds and cut spent heads, as Cutting Back describes.
- Never dividing the clump. After a few years the centre crowds with small bulbs and the leaves come up thin. Lift and divide every 3 years or so, following the steps in Cutting Back.
- Planting into soggy ground. Chives want moist soil that drains and dislike waterlogged ground, which tropical gardens often have in the wet season. Grow them in a raised bed or a pot wherever water lies after rain.
When to plant
Chive seed germinates in soil from 10°C to 30°C. It comes up in 7 to 21 days, or in 1 to 2 weeks at 13°C to 18°C. The plants grow best in mild weather, between about 13°C and 24°C. Because the clumps last for years, sow again only to add more clumps.
| Zone | Example cities | Sow | Harvest | Notes |
|---|---|---|---|---|
| Tropical | Darwin, Katherine NT; Cairns, Townsville QLD; Broome WA | Apr-Jul | All year once established | Sow in the dry season. Grow clumps in pots or raised beds, as wet-season rain waterlogs the ground. |
| Subtropical | Brisbane, Sunshine Coast, Bundaberg QLD; Coffs Harbour, Lismore NSW | Feb-Oct | All year once established | Sowing works all year, but February to October keeps seedlings out of the most humid midsummer weeks. |
| Arid and semi-arid | Alice Springs NT; Broken Hill, Dubbo NSW; Mildura VIC; Kalgoorlie WA | Feb-Mar and Aug-Oct | Sep-May | Autumn sowings must establish before inland frosts from May. Clumps die back over the cold winter. |
| Temperate | Sydney, Newcastle, Wollongong NSW; Melbourne, Geelong VIC | Aug-Apr | Sep-May | Start August sowings in trays under cover. Clumps often die back in winter, most at the cooler Melbourne end. |
| Mediterranean | Perth, Bunbury WA; Adelaide and the SA coast | Feb-Apr and Sep-Nov | Sep-May | In Perth, sowing also works from May to August. Give late spring seedlings shade and steady water. |
| Cool and alpine | Hobart, Launceston TAS; Canberra ACT; Ballarat VIC; Orange NSW | Sep-Mar | Oct-Apr | Early spring suits tableland sowing best; March sowings need to establish before the long, frosty winter. |
At the cold end of a window, start seed in trays under cover and plant out after the last frost. At the hot end, sow in part shade and keep the surface moist.
Site, soil and setup
Chives take full sun or part shade and most soils, as long as the ground drains and is kept free of weeds. Onion-family crops compete poorly with weeds, so clear the bed thoroughly before sowing.
| Get the bed right | What to do |
|---|---|
| Sun | Full sun to part shade, sheltered from strong winds |
| Soil | Fertile and free draining, with a 5 cm layer of compost dug in |
| Poor soil | Well-rotted cow or horse manure, a 5 to 10 cm layer dug in 4 to 6 weeks before sowing |
| pH | 6.0 to 7.0; below 6.0, dolomite lime at 100 to 200 g per square metre, 4 weeks ahead |
| Drainage | A raised bed or a pot where water lies after heavy rain |
| Rotation | Not where onions, garlic or leeks have had white rot (Sclerotium cepivorum), which survives in soil for up to 20 years |
Container growing
Choose a pot with drainage holes, at least 30 cm wide and about 13 L, because a clump can spread to 50 cm across. Fill it with a quality organic potting mix. Onion and garlic chives happily share one pot, and 'Medium Onion' forms neat clumps about 20 cm tall.
- Water: once or twice a week, and more often in hot weather, since terracotta pots dry out fast.
- Feed: seaweed solution at half strength, 15 mL per 9 L, fortnightly while the clump is growing, and nothing in winter.
- Position: a sunny spot outdoors or a bright windowsill indoors.
- Renewal: replace the mix every three years, or divide and repot once the clump fills the pot.
Sowing Seeds
Start chives from seed sown direct in small clumps, or in trays when the weather sits at the edge of a window.
Sowing direct
- Mix the fine seed with a little dry sand so it spreads evenly, as the sand trick for tiny seeds shows.
- Sow a pinch of seed at each spot rather than single seeds, because chives grow best as a clump.
- Cover to the depth in the table below and keep the surface moist until the grass-like seedlings appear.
- Thin each spot to a small tuft and space the tufts as the table gives.
| Type | Store's selections | Depth | Space clumps | First cut | Flowers |
|---|---|---|---|---|---|
| Onion chives, round hollow leaves | Chives, 'Medium Onion', 'Large', Standard (Organic) | About 5 mm | 15 to 20 cm | From about 8 to 10 weeks | Mauve pompoms in late spring |
| Garlic chives, flat leaves about 5 mm wide | Garlic, Garlic (Organic) | 5 to 10 mm | 20 to 25 cm | Light cuts from about 10 to 12 weeks; full picking once established, 8 to 12 months on | White stars in late summer, which self-sow freely |

Starting in trays
- Sow a few seeds per cell of seed raising mix, 5 mm to 1 cm deep, in a warm, bright place.
- Harden off (gradually accustom seedlings to sun and wind) before planting out, as hardening off seedlings describes.
- Plant each cell out whole as a clump, 4 to 6 weeks after sowing, once the leaves are about 10 cm tall.
Care by growth stage
Steady moisture and regular cutting decide how well chives crop. Feed lightly: soft, overfed growth has less flavour, and chives can go unfed in good soil.
| Stage | Water | Feed | Watch for |
|---|---|---|---|
| Germination, weeks 1 to 3 | Light watering to keep the surface moist, never soggy | None until the first true leaves | Slow, patchy emergence; seedlings lost among weeds |
| Seedlings, weeks 3 to 8 | Let the surface dry a little between waterings | Seaweed solution at half strength, 15 mL per 9 L, fortnightly; or all-purpose soluble powder (NPK around 23-4-18 to 27-5-9) at half strength, fortnightly | Weeds crowding the thin leaves |
| First cuts, from weeks 8 to 12 | Deep watering once or twice a week in dry spells | Fish and seaweed blend at half strength, about 12 mL per 9 L, after a heavy cut; or the soluble powder at half strength, fortnightly | Silvery patches from thrips; dark aphids at the leaf bases |
| Flowering, late spring or late summer | Same schedule | None needed | Flower buds to pinch out; seed heads on garlic chives |
| Winter rest, cool and inland zones | Only in long dry spells | None in winter | Water lying around the dormant bulbs |
| Established clumps, from the second spring | Keep watering steady right through picking | Blood and bone at 100 g per square metre in spring and autumn; or controlled release granular (NPK around 14-5-10) scratched in each spring | Orange rust pustules; a crowded, thinning centre |
Mulch around young clumps with straw to hold moisture, and water deeply in dry spells so the whole root system is wet.

Cutting Back
Cutting back keeps a clump leafy and tender, and dividing it every few years renews its vigour.
- Flower buds: pinch them out as they appear for a longer leaf harvest, or leave a few for the bees.
- Garlic chive heads: cut them off once they fade, before the black seed drops.
- Tired clumps: cut the whole clump to about 5 cm, then feed it fish and seaweed blend, about 12 mL per 9 L.
- Warm winters: in subtropical gardens, cut clumps back hard in winter to restore vigour.
- Division: every 3 years or so, in autumn or early spring, fork up the clump and split it into pieces of 10 to 12 bulbs.
- Replanting: trim the leaves right back to cut water loss, then replant the pieces at the spacings in Sowing Seeds, as dividing perennials explains.
Companion planting
Chive flowers bring in bees and beneficial insects, which makes a clump a useful edging for the vegie patch.
Grows well with
- Carrots and parsley, whose feathery tops leave the low clumps their light.
- Tomatoes, which gain from the beneficial insects the flowers draw.
- Roses, where garlic chives are a traditional underplanting and are said to deter aphids.
Keep apart
- Onions, garlic, leeks and spring onions, which share onion thrips, onion aphid and rust with chives.
Harvesting Leaves
Once the leaves are large enough, take light cuts from the ages in the Sowing Seeds table, and let a sparse young clump establish first.
- Cut with scissors or a knife 3 to 5 cm above the soil.
- Take one section of the clump at a time so the whole clump regrows evenly.
- Cut in the morning, once the dew has dried.
- Pick onion chive flowers as they open and scatter the tiny florets over salads.
- Pick garlic chive flower buds for a garnish or for Asian dishes.

Chives lose most of their flavour when dried. Cut leaves keep about a week in a sealed bag in the fridge. For longer storage, chop clean leaves and freeze them in ice cube trays, then use them straight from frozen.
Add chives at the end of cooking or scatter them raw over eggs, potatoes and salads. Garlic chives turn stringy if cooked for long, so add them in the last few minutes.

Common problems
Seedlings fail to appear. Chive seed is slow to start, and seed sown too deep, left to dry out or kept too long often fails. Garlic chive seed stays viable for about a year. Read more
Clumps disappear in winter. In cool and inland gardens, chives die back to their bulbs at the end of autumn and reshoot in spring, so mark where they grow.
Thin, sparse leaves. A congested clump, or one left to set seed, regrows weakly; see Three mistakes that matter.
Clumps rot or yellow in wet weather. Bulbs sitting in waterlogged soil decline, most often in heavy clay or a tropical wet season. Read more
Pests and diseases
Chives share onion-family pests; use only sprays labelled for the pest and the crop, and keep to any withholding period before picking.
Onion thrips (Thrips tabaci). These tiny insects, about 1.5 mm long, suck sap and leave silvery-white patches and fine black specks on the leaves. Read more
Onion aphid (Neotoxoptera formosana). Recorded in Australia on chives, onions and leeks, it forms dark red to black colonies that can make plants yellow and collapse. Read more
Onion rust (Puccinia allii). Bright orange or brown raised spots form along the leaves, and it is most severe on garlic and chives. It is not known in Western Australia, where it is a declared pest that must be reported to the department.
Seed corn maggot (Delia platura). The larvae of this small fly attack germinating seed, and blood and bone dug in just before sowing draws the adults in.
Prevention first
- Dig in manure or blood and bone a month or more ahead of sowing, not the week before.
- Spray aphid colonies and thrips with insecticidal soap or horticultural oil, repeating for thrips, and let ladybirds, lacewings and hoverflies help.
- Keep weeds down around the clumps, since thrips spread from weeds, and hang a yellow sticky card to spot them early.
- Against rust, divide crowded clumps, go easy on nitrogen and put rusted leaves in the bin.
Tips
- Tell onion chive seedlings from grass while weeding: their leaves are hollow and smell of onion.
- Pot up a small clump in autumn and keep it on a sunny windowsill for winter picking.
- Keep dogs and cats away from clumps and scraps, because the onion family is toxic to pets.
- Use chives as an edging along a path or bed, where the flowers feed bees and the leaves are close to hand.
Questions
Do chives come back every year?
Yes. Chives are perennial, and a clump can be cut for many years. In cool and inland gardens it dies back to its small bulbs at the end of autumn and reshoots in spring. In warmer zones it keeps growing through winter. Divide the clump every 3 years or so to keep it vigorous.
What is the difference between chives and garlic chives?
They are separate species grown the same way. Onion chives have round, hollow leaves, a mild onion flavour and mauve flowers in late spring. Garlic chives have flat leaves, a garlic flavour and white flowers in late summer, and they self-sow freely. Sow garlic chives slightly deeper and space them wider.
Why are my chive seeds not coming up?
Chive seed is slow, taking 7 to 21 days, and fails if sown too deep or left to dry out. Sow about 5 mm deep in soil between 10°C and 30°C, and keep the surface moist. Use fresh seed, because garlic chive seed stays viable for only about a year.
Should I let my chives flower?
A few flowers are fine, because they are edible and bees love them. For more leaf, pinch out most buds as they appear. Letting heads set seed weakens the clump, and garlic chives will seed right through the bed. Cut spent heads off before the seed drops.
Can you grow chives in a pot?
Yes. Use a pot with drainage holes, at least 30 cm wide and about 13 L. Fill it with quality potting mix and stand it in full sun or on a bright windowsill. Water once or twice a week, more in hot weather. Replace the mix every three years, or divide and repot once the clump fills the pot.
How do you cut chives so they keep growing?
Snip leaves 3 to 5 cm above the soil with scissors, taking one section of the clump at a time. The clump regrows evenly and keeps producing tender leaves. Regular cutting keeps the leaves fine, and a tired clump can be cut to about 5 cm to push fresh growth.
Grow it



More herb guides
All herbs
Agrimony
How to grow agrimony in Australia from seed: chilling the burrs, sowing months for six climate zones, sun and soil, cutting back, harvest, history and safety.
| Position | Full sun, light shade tolerated |
|---|---|
| Depth | 5 mm |
| Spacing | 30 cm apart |
| First pick | Summer; 12 to 18 weeks from spring sowing |

Angelica
How to grow angelica in Australia from seed: fresh or chilled seed sown on the surface, part shade, months for six climate zones, stems, history and safety.
| Position | Part shade, morning sun |
|---|---|
| Depth | Surface; press in, uncovered |
| Spacing | 50 to 90 cm |
| First pick | Stems at about 18 months |

Ashwagandha
Grow ashwagandha from seed in Australia: warm germination, sowing, site, care and root harvest, with its history and safety, for all six climate zones.
| Position | Full sun |
|---|---|
| Depth | 5 mm |
| Spacing | 45 to 60 cm apart |
| First pick | Roots 21 to 26 weeks |

Astragalus
How to grow astragalus (huang qi) in Australia from hard-coated seed: rubbing and soaking, sowing months for six zones, care, pests and lifting the taproot.
| Position | Full sun |
|---|---|
| Depth | 5 mm |
| Spacing | 20 to 45 cm apart |
| First pick | Roots after 2 to 3 years |